My top Kitchen Gadgets for Desi food lovers….

Alliyah Dawud
February 18, 2019

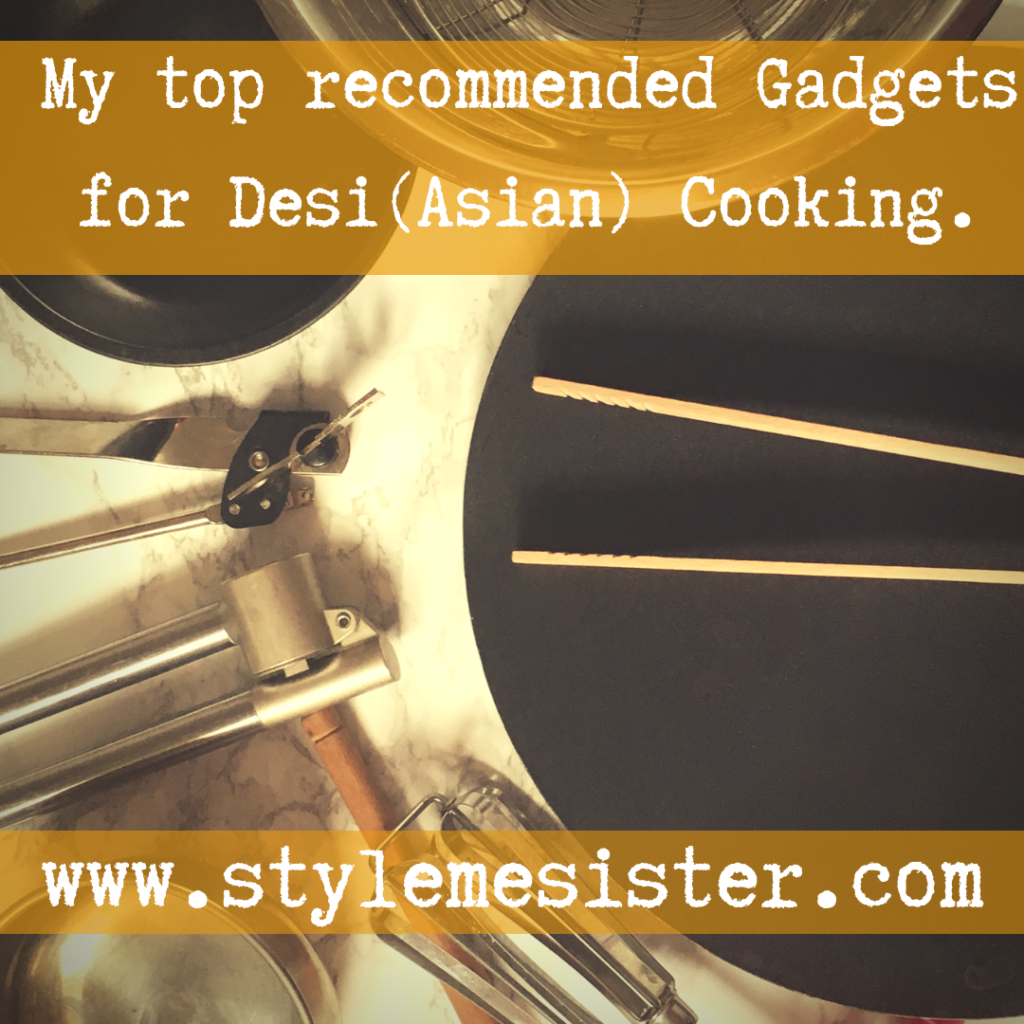
Don’t get me wrong; you don’t need specialist equipment to cook a decent Curry or Pulao Rice at home however I’m Asian and we do things a certain way. So here are my gadgets and gizmos I use a lot of when I am cooking ‘desi food’.

1) Spice grinder aka a coffee grinder.
I try my best to avoid pre grinded spice mixes as I love fresh spices. It’s as simple as that. So I try and buy my spices whole and grind down a months supply at a time. I know the old skool amongst you will say you need a mortal and pester…and that’s fine too however the grinder is faster.
NOTE: I purchase pre-made (grinded) chili powder. For real the pain of making your own is crazy so please do not try it at home).

2) A tava (flatbread pan)
If you make parathas, rotis etc at home I recommend you invest in a good tava. I also use mine to make delicate kebabs (Shaami) on my tava.

3) Electric Rice Cooker
Yes I know my Nanny wouldn’t have had one of these knocking about in her kitchen however modern day cooking in the West is much more different to the homeland. I love my Rice Cooker as it’s awesome for cooking boiled rice, pulao and even biryani. My Rice Cooker has a saute function which makes it uber useful as my kitchen aid. I often freeze pulao masala. When I defrost it I can stick it in the cooker with rice and stock and voila! Perfect pulao.

4) Small frying pan (a one egg pan would be ideal)
I dry roast my spices before grinding them to get maximum taste out of the spices. I have a small pan I keep for just spice roasting. But if you are serious about your desi food you’ll understand my passion of maximum flavour.

5) Strainers
If you cook daal or rice you’ll need a strainer or three. I have fine mesh ones for lentils and rice.

6) Steel bowls (in different sizes)
Great for when you need to make dough and leave it to proof, or make up pakora batter etc.

7) Rolling pin (wooden thin one especially for making super cool rotis.
I purchased mine off eBay.

8) Tin opener
I use tinned Alfonso mango puree to make Lassi as well as using tinned tomatoes in curry bases. So a tin opener is an essential item to have on hand.

9) Wooden Tongues
Ever burnt your fingers turning over a paratha? Painful! So I use wooden tongues to turn over rotis etc.

10) Mortal and pester
Chutney made in one of these is out of this world. Enjoy said.

Other items that come in useful include:

ikea Garlic Press/crusher
Pressure King Pro (for the Pressure Cooker function which is useful for cooking pulses)
Chopping boards & sharp knives
A range of cooking spoons (separate ones for sweet and savoury)
Small frying pan for tempering
Bouquet garni muslin bags-I put the whole spices in them for making ‘yakni’ (meat stock)

My Kitchen Mince Hack (to save you time)

Stylemesisteradmin
February 15, 2019

I admit that I actually include store bought Pizza on my meal plans and if I’m totally honest those nights are pretty hassle free when it comes to time in the kitchen.

Over the last few years I have picked up some hacks I use daily and some that I don’t event get how they made it to pinterest (but that’s a different story).

One hack that I recommend to everyone is bulk cooking; but in various formats.

If like me you use your Slow Cooker (aka Crockpot) at least once or twice a week this hack is going to be your bestie…just trust me on this.

When I talk to friends about using a Slow Cooker for making curries or sauces I often get met with the looks and comments that ‘it won’t taste right because the meat wasn’t browned!” which is quickly followed by “my family will never eat it as it tastes bland/different”.

One of the reasons I started using my slow cooker was to reduce the amount of time I spent in the kitchen. I felt I was tied to the cooker and wasn’t enjoying my food and developing poor editing habits. I started to dislike cooking and that was a problem for me. I never want my children to think cooking is a chore; I’m a believer that everyone should have the skill to cook healthy food. I don’t know where my girls may end up at University level so I honestly want them to have cookery skills and also enjoy the time they spend cooking (after all if you’ve got to do it why not enjoy it?).

We enjoy curries, mince based pasta dishes, casseroles….various meals as a family. A lot of these dishes call for braising of the the meat before adding liquids and the other ingredients. Now on some slow cookers you have this function which is bloody awesome! But not all models have this. Which is a shame.

Considering how simple I like to keep things when I cook things in the slow cooker I decided to do the following:

Brown off mince in bulk (so 2-3 KG at once) with garlic and onions.

I then drain and cool the mince before portioning the mince up and freezing it.

The result?

I have mince ready to go in:
Pasta sauces
Curries
Chili con carne
Shepards Pie
Cottage pie

Etc etc etc….

Because I don’t add salt or spices I’ve got more options. I never cook mince without garlic and onions however if you wished to you could omit them.

To create 6 family meals (servings produced: 6/7 giving me leftovers for School lunches and for myself the next day) you will need:

3 KG mince (I use mutton but you can use whatever you wish to)
6 medium onions diced
A full bulb of garlic crushed/minced (yes I love garlic)
3/4 Tablespoons rapeseed oil

Extras:
kitchen paper to drain off excess fat
Storage bags/boxes to store mince in freezer (don’t forget to label the mince)

1) Heat a large pan on a medium heat (if you don’t have a large pan you may need to do the browning in smaller batches. Add the oil.
2) Add the onions and fry for a few minutes until the onions are soft. You are not going to brown them.
3) Add the garlic and fry for a minute (you don’t want to burn the garlic. And believe me that’s a really easy thing to do).
4) Add the mince and break down the mince and fry.
5) Fry for 5-10 minutes. The mince won’t look very appetizing. That’s fine! What you want is to ‘seal’ the mince by frying it. The process won’t cook the mince completely and that’s fine too.
6) Turn the heat off and drain the excess fat off. I do this by tilting my pan when its slightly cool and scoop out the mince mixture and place it on kitchen paper. I let the paper absorb the fat.
7) Bag/box up the mince and label them.

How to use the mince:
I take the mince out the night before and place it in the fridge to defrost. I then add it to the slow cooker with the other ingredients and forget about it. Job done.

You can do the same with meat and treat it the same.

I’ll be over for Dinner later guys; so get cooking!

Slow Cooker Taco Soup

Alliyah Dawud
February 8, 2019

I love my Slow Cooker (crockpot). I use it on the regular…even in the hotter months as it doesn’t heat up the kitchen.

I love tacos….and also easy family meals where you don’t need to weigh out ingredients. So here I present to you my Taco Soup…which tastes soooooo good. And no two bowls are the same when you pimp it up with various toppings.

Makes enough for 6 large bowls. I’ve successfully frozen leftovers too.

Ingredients:

SOUP:
500 grams browned mince (or raw mince)
2 small onions diced finely
1 400 gram tin chopped tomatoes
200 ml water
1 tbsp salt (or less depending on your dietary requirements)
1 tbsp cumin powder
1 tbsp coriander powder
1 tbsp dried mexican oregano (or standard oregano)
2 tbsp fresh coriander chopped finely
1 tsp chili powder
1 tsp smoked paprika (or standard paprika)

Add the following 30 minutes before serving:
1 400 gram red kidney beans drained
1 400 gram white kidney beans drained

To thicken the soup:
1 tbsp cornstarch

Optional items:
1 whole chipolote chili
Liquid smoke

Garnishes/toppings (mix and match as you please):

Soured cream or low fat yogurt
Grated cheddar cheese
Crushed up taco shells
Crushed up torilla chips
Lemon or lime wedges
Tomatoes chopped finely (I like using cherry tomatoes as they are sweeter but that’s optional normal tomatoes will also work)
Red onion-finely chopped
Jalepeno pepper slices
Fresh coriander leaves-chopped finely
For extra heat fresh chili finely chopped

1) Place all the ingredients listed under soup in your Slow Cooker. Turn the Slow Cooker on to a high. Cook for 3 hours.
2) Now add the drained kidney beans. Stir through. Add two tablespoons of water to the cornstarch and mix. Add the mixture to the soup and stir. This will thicken the soup up for you. If you don’t like thicker soups just skip this step!
3) Place the lid back on and leave for another 25-30 minutes. Turn off and remove lid if you don’t want the beans to ‘cook’ further.
4) Ladle into bowls and serve garnished as you wish. I make a ‘toppings bar’ and allow everyone to personalise their own soup.
5) Leftovers will keep for 48 hours easily in the fridge. Can also be successfully frozen (use within a month).

My Slow Cooker Pasta Sauce

Alliyah Dawud
January 25, 2019

Note: this recipe is by no means a REAL ITALIAN sauce. This is a sauce I make that is pretty much easy to put together (in less than 5 minutes if you have frozen browned mince in your freezer).

This is enough for 4 family dishes serving 4 at a time so 16 servings (or more depending on your portion sizing and if you wish to add additional vegetables).

Ingredients:

4 tablespoons pre-fried onions soaked in water for 20 minutes then drained.
6 8 cloves of garlic crushed
2 tablespoons rapeseed oil
1.5 kg mince of your choice (I use Mutton)-you can use vegan mince if you wish
1 small (250 gram) box of mushrooms diced finely
2 bell peppers (I use red) deseeded and finely diced
1 tablespoon dried oregano
1 tablespoon dried basil
1 teaspoon dried thyme
Salt-to your dietary requirements
1 tin (approx 400 gram) chopped tomatoes
1 carton passata (the approx 390 gram carton-not the small one)
125 ml water

For thickening:
1 tablespoon cornflour
Extra water

1) Heat a large pot on a medium heat and add the oil. Fry off the mince to seal it and retain moisture. This step takes me 15 minutes tops but adds a lot of flavour.
2) Add the garlic to the mince and fry for another 1 to 2 minutes. Turn off the heat.
3) Drain off the excess oil from the mince.
4) Add all the remaining ingredients to the Slow Cooker and the mince. Cook the mince sauce on a low heat for four hours. I check up on the mince after 2 hours and give it a stir.
5) After four hours the mince should be cooked (as should all the other ingredients). If the sauce isn’t as thick as you would like make a ‘slurry’ using the cornflour and a little bit of water. Add that to the Slow Cooker and stir in. Check up on the sauce after 15 minutes. The slurry should help thicken up the sauce.
6) If you are happy with the sauce consistency turn off the heat and allow to cool before freezing.

Note: if you find your Slow Cooker uses up more liquid than mine you may need to add more water. But that’s only if you use up all the ‘liquid’.

TIPS:
If you have fussy eaters and need to get vegetables into your family diet blitz the vegetables and add them to the sauce. If you feel your family won’t like the texture you can fry off the vegetables with the mince. This gives them a more ‘fried’ taste.

This sauce is clearly awesome with and can also be used in your favourite pasta bakes, skillet pasta dishes, cannellini and lasagne too. Leftovers can be used as jacket potato topping or even to top ‘Italian inspired Hotdogs’.

You can also add crushed up pulses to add extra protein.

Grated carrots are also a good addition and hardly detectable with the tomato sauce.
Tinned tomatoes with herbs and garlic will add additional flavour.

For extra flavour add a handful of olives (rinse them first to remove extra salt).

Remember that cooking in a Slow Cooker results in less liquid ‘evaporating’.

Marinaded Hotdowgs

Stylemesisteradmin
December 28, 2018

Marinated Hotdogs

*Turning the boring hotdog into va va voommmmmmm dowg*

I really admire Mamas that can be openly honest about the fact they *DO* feed their children the food groups that make the pro-raw-no sugar-no fats-no flavour-taste like cardboard foodie Mamas jump straight into their early graves.

I do not feed my children ‘junk food’ on a daily basis however I do factor in ‘treat foods’ because I’m a firm believer that forbidden fruit will drive you to your limits to taste them. So rather than eliminating things from my children’s diet I operate a ‘food within moderation’ system.

My girls love Hotdogs. I am personally not a fan of the humble dog however give me a pimped up dowg and I’m more likely to bite your hand off for a bite of yours.

Standard hotdogs boiled/warmed up make me heave. However marinating them will take them into a realm of their own. I’ve included THREE marinade recipes for you to enjoy. I have it on good authority that these dowgs are the bomb. Okay enough embarrassing street talk let’s get down to business.

These Hotdowgs will literally take your next BBQ up another level without loads of prep work. Trust me on this. Once you marinate dogs you ain’t.never.going.back.

You will need:

6 Standard Hotdogs (I use a beef and chicken mix ones as I follow a Halal diet)
6 Hotdog buns (Brioche Buns are cool for adults….or keep it standard if you wish).
Fried onions

To prepare the dogs:
Remove from the packaging and wash thoroughly.
Now is the fun bit. You want to get flavour into the dogs (not just on the outside). I’ve tried two methods. I pricked the dogs and marinated them and it failed. So I recommend you make small cuts at side of the dogs (basically the dogs will look like they have fins). This method works super well and I got compliments on the dogs so we know it works.
Repeat for all the hotdogs.

Recipe one: the party favourite.

Ingredients:

6 TBSP tomato ketchup (you can use a cheap version however if you do want to be flashy it won’t hurt)
4 TBSP Worcestershire sauce
3 cloves of garlic-crushed!
1/2 TSP crushed chili/chili seeds

1) mix all the ingredients together in a ziploc bag and add the hotdogs. Seal the bag and ‘massage the dogs’ to cover the in sauce. Leave them in the fridge for at least 4 hours (up to 24).
2) Remove from the marinade and cook. You can fry these bad boys or BBQ them (so bookmark this recipe NOW or when summer rolls up…).
3) Serve in the buns with fried onions (optional). You don’t really need any additional sauce.

Recipe two: Sweet and sour dowgs

This recipe is a favourite amongst children that like a bit of sweet and savoury. Adults will love it too…but kids will love these.

Ingredients:
3 TBSP sweet chili sauce
1 TBSP honey
Juice of 1/2 lime
2 TBSP tomato ketchup
Optional: 1/2 tsp chili flakes

Repeat method as above.

Recipe three: Sweet BBQ Chili

Some like is smoky; I love it hot. Here’s a crowd pleasing marinade for the hotdogs.

Ingredients:
2 TBSP BBQ sauce
2 TBSP Sweet chili sauce
1/2 TBSP honey
2 clove garlic-crushed
Optional: liquid smoke (follow instructions on how much to use on the bottle).

Repeat as above.


Top tip: these marinades also work for mini sausages so if you need to spice up your buffet for a party look no further.