Easy peasy spicy egg and black bean burritos (An awesome Breakfast)
Eggs are awesome. Not only do they cook fast but they are cheap, nutritious but are also versatile.
Black beans are magic. I bulk boil them and freeze them so I have a constant supply. I use them in tex mex dishes, Quesadillas, salads, rice bowls and these awesome Burritos.
If you use freshly boiled beans you can make some extra Burritos to freeze so you always have a hot Breakfast on hand in the freezer. Plus these bad boys are healthier than a lot of the ready made stuff you can pick up at certain fast food places.
This is a great recipe to use for bulk preparing Breakfasts.
To make two of these bad boys you will need:
2 large tortilla wraps
4 eggs (see note below)
Red Chili powder (to your tasting: I find a 1/4 of a tsp is enough as I also add chili sauce)
2 TBSP milk
Salt
Pepper
(whisk the eggs with the milk, salt and pepper)
1 TBSP oil (or a small knob of butter)
6 TBSP cooked black beans
TBSP salsa (I use a chunky one)
Optional: chili sauce
Coriander leaves
1) Whisk the eggs, milk, salt and pepper together.
2) Heat a medium pan and add the butter (or oil) on a medium heat. Now add the egg mixture and stir well. It will start to form clumps of egg. That’s what you want. Cooking the eggs should take around 4-5 minutes.
3) Lightly warm the wrap.
4) Place on a large chopping board or plate and add half the mixture. Add half the beans. Push the mixture towards the centre (I would watch a Burrito rolling video to understand the technique).
5) Add the beans and salsa. Add the coriander (if using) Sprinkle on the cheese. Add chili sauce if required.
6) Now roll that bad boy up!
7) Serve!
To freeze: Roll up the Burritos and wrap in Cling film. Then place in a ziploc bag, label and freeze.
To heat up: take out of the freezer. Remove from the bag and remove the cling film . Take a piece of kitchen paper and dampen it. Wrap it with the paper (loosely) and zap in the Microwave for 2.5-3 minutes. Remove the kitchen paper carefully to avoid it sticking to the Burrito. Remove from the Microwave and allow to stand for 2/3 minutes. Check the Burrito is defrosted and heated completely before eating.
Serve with a big dollop of Ketchup or my favourite Chili and Garlic Ketchup (sold at most Asian food stores).
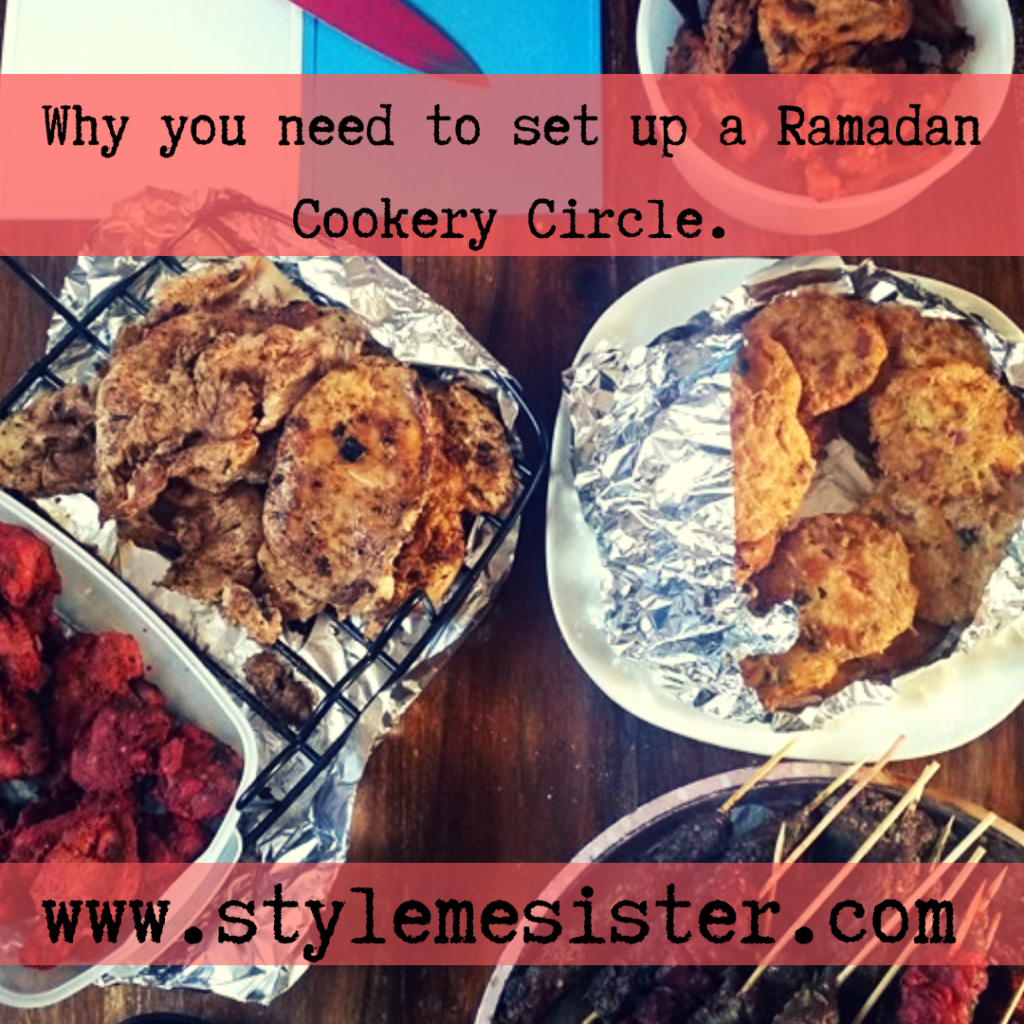
Ramadan is the most blessed months a Muslim can experience. Its a time for contemplation. A time to reflect and change the direction of life. Its a time to give back to charity. It’s a time to get closer to our faith.
Sadly for many sisters its a time where they find themselves chained to the kitchen when they should be reaping the rewards of this awesome month.
For a lot of families food plays a huge part in Ramadan. There’s Sahoor and Iftaars to plan, prepare and cook. Then there’s hosting Iftaars for nearest and dearest (which FYI I haven’t done in a decade). That’s a large chunk of time on a daily basis. By the time you’ve cooked and cleaned up energy levels are at a low and the idea of staying up to repent or pray is near impossible (because half hearted recitation is also a no-no; you want to focus and give it your best).
A couple of years ago I started to batch cook food used in Ramadan and froze it in suitable sized portions. This helped me no end. There was no last minute mad panic in the kitchen. Things ran smoothly; very smoothly.
I then came to the realisation that my issue of balancing the time spent preparing and cooking food with the actual important duties of Ramadan were a problem for a lot of sisters. And if you are reading this and nodding along I have an idea that may help you a lot….
Ladies I present to you the idea of setting up a Ramadan Cookery Circle.
For this idea to work you will need a group of ladies in a similar position to you.
How this works:
Basically you come together with a group of ladies and cook a few recipes in bulk. You then swap portions of the food with others in the circle for food they’ve cooked. And voila; you have instantly increased the amount of food you have for your Ramadan freezer.
Sounds pretty easy doesn’t it? I’ll still talk you through it.
STEP 1:
Gather your friends that will be having the same issue as you during Ramadan together.
STEP 2:
List all the food that you guys know you will be cooking in Ramadan. These foods need to be suitable for freezing.
STEP 3:
List all special dietary requirements including how hot people like spicy foods!
Share recipes (if required) with the group.
STEP 4:
Delegate the recipes out to the group. Agree on how much of each recipe needs to be made.
STEP 5:
Decide when you want the food to be cooked by and where and how the food will be delegated. Will you guys meet up a few days before Ramadan to swap food?
STEP 6:
Take the food home and freeze.
Now that doesn’t seem to be that scary does it?
The idea behind this is you save time by bulk cooking your delegated recipes and then you swap some with the others.
So if there’s 5 of you and you each of you cooked 2 recipes in bulk you are walking away with 10 dishes for your freezer (including what you cook yourself).
Don’t you think that’s awesome?
And the more of you there is there’s potential for less work and more dishes.
In my experience the following are awesome for freezing:
Samosas and rolls
Burrito rolls (great for Breakfasts)
Kebabs/Koftas
Pulaw and Biryani bases
Chutneys
Curry sauces
Meatballs (so pasta sauces, koftas etc).
What else should consider?
How much freezer space you have.
How much time will you need to prepare and cook your dishes in bulk.
Is everyone happy with their delegated dishes.
Do you want to swap dishes or do you want to pay for the ingriedents instead?
The idea of the circle is to cut your time in the kitchen and essentially share cookery skills and invest more time into Ramadan doing things that will be fulfilling.
With Ramadan on it’s way why not share this post with your ladies and see whose willing to sign up to your circle?
The BIG holiday survival guide (As written by the Mama of a 5.5 year old and 8 year old).
NOTE: I am publishing this article just before the Easter Holidays so you have at least SIX weeks to get your butts in gear. I’m nice like that!I’ll be honest with you; I’m pretty much winging this parental business to a T.
And when the big 6 week Summer break hits boy am I panicky and jittery like a coffee addict in Ramadan. After spending a few years being disorganised and crying tears of joy come the beginning of September I came up with a system to keep my sanity. I’m sharing my tips, systems and other bits with you guys below.
First things first: find out as far as you can in advance what the holiday dates are. Get hold of a calendar that has enough space to make notes on. I love the 18 month Gruffalo Calendar which I get off Amazon as there’s a column for each of the ladies in the family. The Book People also do great calendars (and usually cheaper too). Put all key dates on the calendar e.g. Birthdays, holidays or when the children will be visiting the other parent etc.
Work out any budget restraints you have for the holiday period. This is vital to ensure you don’t over promise and under deliver (I usually don’t tell my girls what the plans are until the actual day to stop any over excitement). Make a list of all the activities and places your kids love. If you use social media go onto the companies pages and follow.
Sign up to their offers. A lot of companies send out exclusive offers and its vital to be on the lists to get the information before others. So for example my girls like Trentham Gardens so we follow them on Facebook. They also like Safari Parks so we follow them too. That way we never miss any events or offers.
My girls love the following: Outdoor events Music Films Cooking (& baking)Books Gardens/Parks Theme Parks Theatre Themed events where they can dress up.
History (Museums)Arts and Crafts Currently we are located in a small town in the middle of Birmingham (my hometown) and Manchester (my adopted hometown) called Stoke-on-Trent. This city is also known as The Potteries and has produced more Pottery than anywhere else on the planet.
History buffs will love to know Reginald Mitchell was a local lad (google the Spitfire). There’s some really beautiful gardens around too (Trentham Gardens, Biddulph Grange Gardens) and for Theme Park fanatics (guilty) there’s Alton Towers (also good for history buffs and those that love gardens) and Drayton Manor (where you’ll find Thomas Land).
There’s also loads of natural beauty spots such as Dimmingsdale and Mow Cop Castle ruins. Stafford is less than 20 minutes by train and it has one of the most beautiful spots you have ever seen (Victoria Park).
We have a great Library and Museums that organise regular events for children throughout half term and the big holidays. It’s a blessing that my children love books and crafts too.
Birmingham and Manchester are less than an hour away by train or motorway.
Liverpool is around 1 hour 30 minutes by train.
Blackpool is around the same by train too.
London is less than 2 hours by direct train.
And Rhyl is around 1 hour 45 minutes by train.
All in all we’re quite central to so much. So based on my children’s likes I follow the following on Facebook:
Stoke-on-Trent Libraries
Stoke-on-Trent Museums
Ford Green Hall
Stoke-on-Trent Park services
Stafford Gatehouse Theatre
Alton Towers/Merlin Passes
Birmingham Museums
Manchester Museums
Manchester Parks services
Manchester Arena
Trentham Gardens
National Trust (which covers lots of venues around the area including Biddulph Grange Gardens).
I am also subscribed to the Enjoy Staffordshire website newsletter. Once I know what events are happening I mark them ALL all on my calendar (even ones that clash so I know what is actually happening across the city and beyond).
This is essential. Why? Because events can get cancelled and the great British Summer can be anything but predictable so its always worth having a plan B.I’m then able to see how many potential outings we can have a week. I then look at costs. In some cases it’s cheaper to opt for an annual pass if you plan to visit a venue multiple times.
I then list what I would like a week to IDEALLY look like:
2/3 x outings (some events are on the same day so we may get more out of the actual day)
1 x cooking/baking activity (I gave the girls cookery books aimed at their age ranges and asked them to place sticky notes on the recipes they wished to try. I also use I can cook recipes off the BBC website).
1 x crafting activity (Top tip: if you use Pinterest create a board to pin ideas to so you know what you’ll be doing and what materials you need in ADVANCE).The girls spend one day with their other parent so I need to factor that in. That leaves two days as potentially free for play dates or free play. This schedule works for us; however this much activity may not work for you. Find your balance. Unless we go on a day out activities generally last up to 3 hours (craft sessions at the Museum etc around an hour or 90 minutes tops). Considering the time of the activity I then make a note of if we need packed lunches (or a picnic if the weather is good and there’s a park nearby). I then fill out a weekly summary sheet. This contains the following information:
What activities and events are happening that week Any day trips we are going on (e.g. Stafford Gatehouse) Do need to buy tickets in advance/do we need annual passes etc If we need packed lunches Weather predictions (roughly) Any specialist clothing required What time we need to be ready for Do we need lunches Any materials or ingredients needed for cooking or crafts activities. Any additional notes.
Sounds like a lot of work right?
Well I created an A4 sheet and simply complete that. It took me around 3 hours to plan out the 6 weeks.
BUT it’s now all planned out. It also made it easier in case their Nana had to step in for me (everything is mapped out).
Of course plans can change; for us though it was important to get the bulk of things down and planned for my own sanity.
Post holiday review (what worked and what didn’t): First thing that I want to say is children all mature at different ages. Suddenly the Library and events there were too ‘kid like’ for my oldest which threw a spanner in the works for me as I had a few of their events on our calendar. So that’s something I need to consider next time.
Having the opportunity to try different things and knowing what was happening in the local area proved a huge blessing.
It stopped us from having dull weeks.Next year we will be scheduling visiting friends at home to just watch a movie, go the park etc.
Sometimes it’s the company that matters more than the activity.Children get tired so we ended up spending days doing NOTHING. Just to recharge our batteries. The girls enjoyed free play in the garden.
We found keeping toys in the garden in those outdoor storage trunks helped the girls spend more time outdoors. Our best investment during the holidays was our membership to the National Trust. We bloody love their venues and events they hold.
Crafty stuff always proved popular. We didn’t have many wet days however we had various activities on standby. My system worked for us. I’ll be using this system for holidays (including the one week half terms we get in England and the Easter break).
I thoroughly recommend the Gruffalo Family Planner as it comes with stickers and has plenty of space to write things in.
What do you guys do to stop yourself stressing in the big break?
Walk into any kitchenware aisle and you we will find lots of modern day stuff that is….useless. I have boxes full of gadgets and gizmos but as a home cook (or self taught cook) there are some things that I cannot live without.
1) Garlic crusher
Life is too short to peel and crush garlic. I have a trusted crusher I got from ikea many years ago and it’s still going strong.
2) Knife sharpener
Ask any cookery buff and they will tell you that blunt knives are a pain in the neck. To be efficient in the kitchen you need the right tools in perfect condition. And for me sharp knives are essential. No one likes chopping up an onion with something that couldn’t even chop up butter. End of story.
3) Digital scales
If you love baking you need these bad boys. Baking is a science guys; a science! No more estimating weight on the old fashioned scales.
If you don’t like baking but have children I still would recommend you invest in digital scales. If anything you maybe surprised at what a child’s portion of sweets and treats is.
4) Lemon elbow (press)
If you make cocktails, mocktails or bakes with lemon you need a press in your life. You don’t need biceps to get the maximum amount of juice out of a lemon these are awesome. You can also get a lime elbow too do if you like a good mojito you may have a set of these bad boys in your kitchen drawer.
5) Stick blender (With bowl attachment)
I have a range of Food Processors but they are huge and take up a lot of space on the counter. So for quick jobs e.g. making a marinade, soup or sauce I use a stick blender. Quick and easy to clean too. I have one with the bowl attachment which gives me more versatility.
6) Electrical Whisk
If you like frothy coffee drinks this is an essential for your kitchen. I got mine from good old Argos and paid under £10.00 for it. It’s battery operated and makes the best frothy drinks ever.
7) Mallet
Sometimes you just want to cook things quickly…especially meat/chicken. For that reason I have a mallet to flatten out meat. Plus it ‘stretches out’ the fillets which is always good!
8) Box/Triangular grater
Watch those fingers whilst using these. We love cheese so a grater is essential. Grating cheese yourself will save you money compared to pre-grated packs.
9) A range of knives and knife sharpener.
I’m not the only self taught cook that will tell you that sharp knives are a must have item in the kitchen!
10) A good quality Tin Cutter
Goes without saying but seriously you need a Tin opener/Cutter that does what its suppose to do!
What are your TOP kitchen gadgets? Let us know below or share with us on Social Media.
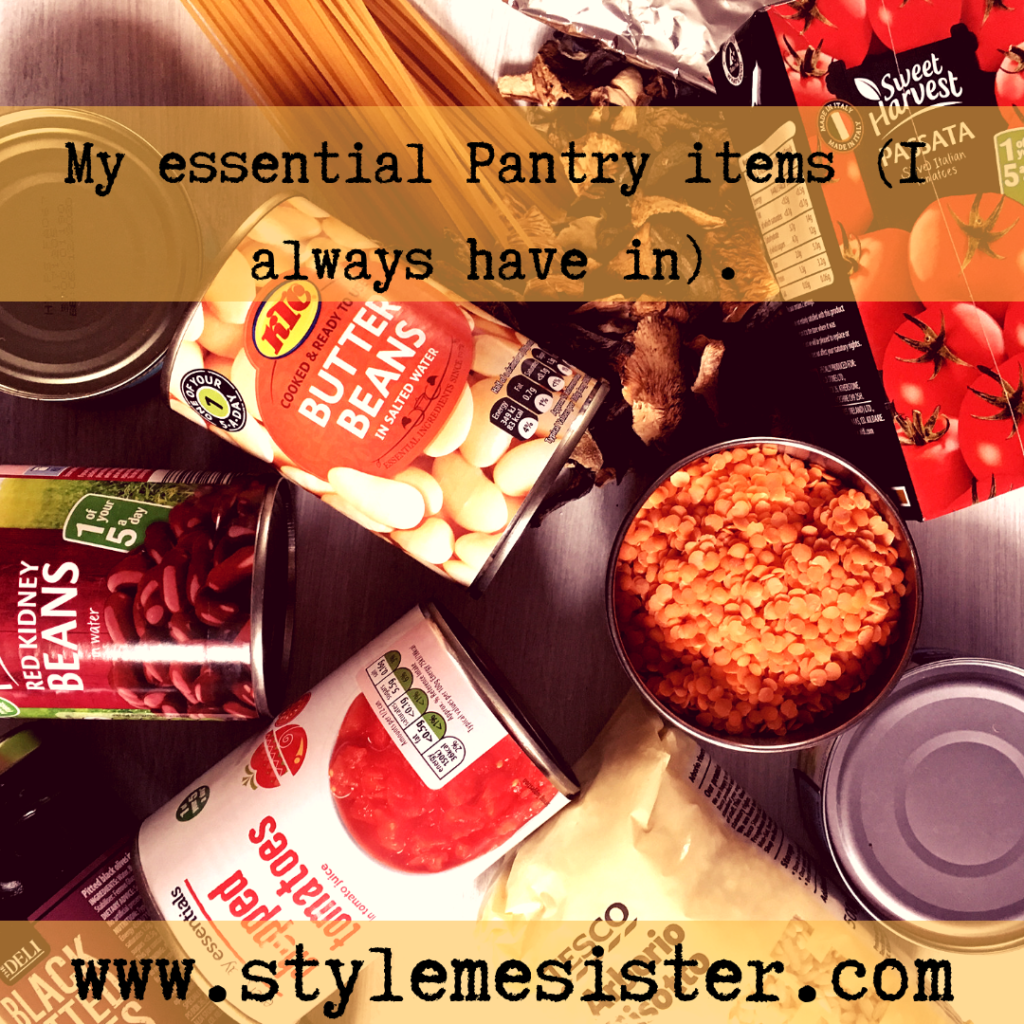
I hardcore meal plan; however even I will admit there are times when planning can and will go wrong (e.g. you forget to pick up Naans for the curry and have no rice in your pantry). So I have a good stocked Pantry…actually it’s a wall cabinet. My kitchen doesn’t have a Pantry…but for the sake of the average reader we’ll stick to my imaginary Pantry.
1) Dried Mashed potatoes
This is most probably my most favourite item. Cheap and effective when you compare the price of potatoes, time taken to prepare them and the power it takes to cook them.
How I use them: in alu tikkis (which I serve as tikki burgers too), shepard’s pie topping, as mashed potato, potato cakes, potato pie…there’s so many ways to use them.
2) Tinned lentils and pulses (in particular red kidney beans, chickpeas, white kidney beans, black eye peas amongst others).
How I use them: I add them to stews, curries, cous cous, salads, mash them up as an alternative to potato mash, make tikkis (kebabs), add to chilis…and so on. You can make some great quesadillas from Pantry items too!
3) Chopped tomato tins
These guys are the king in the kitchen. The base of curries, soups, pasta sauces and bakes….these guys rule really. You can get tinned tomatoes with garlic and herbs added too which are great for pasta sauces.
How I use them: pretty much in what’s listed above! A staple in many recipes. I’ve also been known for adding a bag of pre cooked meatballs, herbs and a tin of tomatoes to the slow cooker to make a quick pasta sauce that I don’t have to stand over the stovetop to cook them.
4) Dried wild mushrooms
In all honesty I know you guys are looking at the screen thinking I’ve gone posh. Hear me out. These guys are a bit more posh than standard mushrooms but sometimes you need to treat yourself to something a bit more exotic.
I add these to risotto rice and make a simple baked risotto. I also add them to pasta sauces too. I love these guys. You can fry some off with garlic and top bruchetta for a supper.
How I use them: soak them first as per packet instructions and then use them as required. Great in risottos.
5) Various rices e.g. paella, risotto, basmati.
The list is endless to why we need carbs in the Pantry but most dishes call for them (especially one pot type or family meals).
How I use them: I use basmati in pulao rice dishes, paella rice in paellas and risotto rice in oven baked risottos (which require no stirring-yay). Also great for serving with curries or stir fries. There are other varieties too e.g. Jasmine, sushi, pudding.
6) Various Pastas
I keep a range of pastas around from spagetti to macaroni.
How I use them: in bakes, with sauces, in soups…. I’d say pastas are the top UK carb (or in the top three). Cheap and filling too so work out for budgets too.
7) Cous Cous and other ‘grains’
I love moroccan food and if you offer me a holiday to Marrakesh right now I’m likely to beat you to the airport. Cous Cous go great with Tagines and also with seekhs, kebabs (as a nice side dish) and also make a great salad too.
How I use them: with Tagines, as an alternative side to rice and in salads.
8) Dried herbs/spice blends/rubs/waters
I have loads of these and in all honesty could write a huge article on them. To save you time I will say look at what type of foods you enjoy and stock up in accordance to that. So if you love making curries go for chili powder, tumeric, cumin powder and coriander powder. You can also purchase whole ‘garam masala’ and grind some as when needed (the ready grinded stuff is horrible).
Rubs: you can make your own signature blend again depending on your own preferences.
Herbs: if you love pasta and pizza mix a batch of Italian inspired herbs to keep on hand to add a bit of snazzy to your meal.
There’s also more ‘posh’ things you can add to the Pantry such as dried rose petals, saffron and rose water.
9) Pizza Base mix packets
All you have to do is add liquid, knead and voila homemade pizza!
How I use them: with passata, herbs and cheese for a simple pizza for making homemade calzones.
10) Plain and Self Raising Flours
If you want to introduce the children to cookery baking is a great way…and should keep their attention too!
How I use them: in cakes, blondies, pie crusts, homemade naans… the list is endless.
There’s a host of flours you can try on the market. You can get strong flour to make your own bread. Rye flour for an alternative flavour…get experiment if you want to get the children involved too.
11) Sugars
If you enjoy baking there’s a huge possibility that you need sugars. I have castor sugar, granulated sugar, soft light brown sugar, soft dark brown sugar and sugar crystal sticks.
How I use them: I use castor sugar is most cakes. Blondies call for brown sugar. I use dark brown sugar in caramels. Granulated sugar is used to make sugar syrups. Sugar sticks are used in things like mint tea (or as a photo prop if you are a food photographer).
Tip: you can make your own flavoured sugars really easily. Just add the flavouring to a jar (e.g. a tablespoon of rose petals and a level tsp of fennel seeds to 500 grams of castor sugar to make rose and fennel flavoured sugar for cookie making.
12) Cocoa Powder
Cocoa is a bakers best friend. And also makes great hot chocolates too.
How I use it: in brownies and fresh made from scratch hot chocolates.
13) Various chocolate bars
I have a range of bars in stock at home. From the cheaper 100 gram plain bars to mars bars and so on. And no I don’t spend all day gauging on chocolate.
How I use them: I add them to cookies, ice cream, chop them up and add them to ice-cream sundae bars, melt them down with double cream and make naughty sauces…..
14) Old Fashioned oats
One of the best grains out there.
How I use them: in overnight oats, traditional porridge and in my favourite chocolate chip and oat cookies! Can also be added to smoothie bowls to make the smoothie more filling. You can also make granola with them.
15) Long life milk
As a parent my fear is running out of the white stuff….
How I use them: as a standby for if I forget to go the stores. When the date is nearly running out I can make porridge, rice pudding etc etc. Milk is never wasted in my house.
16) Vac packed Naans and Tortilla wraps
Sometimes you simply forget things and that’s fine. These guys are heroes (especially the wraps when you are preparing packed lunches for children).
How I use them: Pantry quesadillas, burritos, torilla ‘lasanga’ and the naans with a curry or kebabs.
17) Dried (dehydrated) garlic and onions. And fried onions too.
Fried onions are my favourite for making a quick pulao or curry (no cutting or frying off onions what’s not to love right). I use dried garlic and onions in ‘tarka daal’ which is my favourite comfort food ever.
How I use them: in tarkas, garlic in pasta sauces, fried onions in curry and pulao bases. No onion cutting=no tears or headaches.
18) Dried lentils
In all honesty I cannot see a Pantry with no lentils in it. Is this because I’m Asian? Possibly.
How I use them: mainly in daal (lentil curry) dishes. Masoori (split red lentil) is ready in less than 20 minutes. What’s not to love about a protein packed curry like that?
19) Jarred olives (green and black, stuffed too)
Olives add a great punch of flavour to dishes as well as being something the girls can graze on (always rinse them off first).
How I use them: in pasta sauces, smashed up on brushetta and as part of my girls snack boxes.
20) tinned/jarred fish
I love anchovies! I cannot get enough of this salty delight. I also love tuna….
How I use them: I use anchovies in my quick pasta sauce dish. I use tuna in salads, in sandwiches and in quick tuna fish cakes (using dried mash potatoes).
And that concludes my top 20. What’s on your list? Drop your comments below or why not share your essentials on our Social Media.