Zesty Citrus Slices

Alliyah Dawud
November 2, 2017

Zesty citrus slices

I absolutely love citrus fruit. My favourite has to be lemons closely followed by limes. Lemons are just so versatile. From being the feature of a lemon drizzle cake to being a star of a tagine and not to forget good old lemonade.

So when I was looking for something awesome without cocoa powder citrus popped up in my mind.

These slices are great. Extremely easy to make and versatile as you can switch up the citrus fruit to suit your fruit bowl.

I’ve tried the following:
Lemon and lime
Lime
Orange and lemon
Orange
Orange and lime

So as you can see you can mix and match the citrus to suit your needs. My favourite is pure lemon which I believe goes really well with mint tea (Arabian style).

Ingredients:
180 Grams plain flour
80 grams icing sugar
180 grams margarine or other solid fat suitable for baking (softened/melted)

For the citrus filling
3 eggs
Juice of 3 citrus fruit (or two if you are using oranges. So you can use 1 lemon and 1 orange) . Don’t forget to strain the juice.
Zest of the citrus fruits
270 grams caster sugar

Extra icing sugar for decorating

1) Preheat the oven to 375F (160 C). Grease a 19cm by 19cm square square pan. I use Wilton Cake Release greaser as it has never let me down and is less messy than traditional butter and flour.

2) In a large bowl combine the plain flour, icing sugar and margarine. Use a wooden spoon. What you’ll have is a rough dough like mixture. That’s fine. It’s meant to look like that.

3) Tip the flour mixture into the pre-prepared pan and pat down (pushing into the corners too). Try to level out the mixture as much as possible.

4) Now place in the oven and bake until lightly golden (approx 25 minutes).

5) Whilst the pastry layer is baking create the filling. In a large bowl (go on; wash the bowl you used the create the first layer) add the eggs, caster sugar and zest whisk. Now add the citrus juice and whisk a bit more.

5) take the pan out of the oven. Pour over the filling mix. Return to the oven and continue to bake until lightly golden ( check after 20 minutes to ensure you don’t burn it. My slices took 30 minutes to become golden brown).

6) Take out of the oven and allow to cool completely.

7) Dust with icing sugar and slice into 9 slices.

8) Serve with a nice cup of Mint Tea/Coffee or whatever you prefer.

Keep these slices in an airtight container and eat within 5 days.

NOTES:
For an extra citrus kick add the zest of one fruit to the dough mixture.


5 Top family night ideas

Alliyah Dawud
October 25, 2017

5 top ways to spend time together as a family

Admit it. Sometimes the idea of organising a ‘family night’ can bring on more stress that a two mile traffic jam when you have five minutes to get your appointment.

I’m all for quality over quantity. I do cherish the idea of eating together but it’s not always possible (cue-the endless after School clubs, Quran classes, homework, housework, prep for work etc etc). So instead of telling you the only way to be a strong family is to eat together everyday I thought I would share my top 5 family night ideas.
If you have your own ideas do leave them in the comments section.

1) The classic-Movie Night

With the rise of on demand services Movie Nights just don’t have the same allure; unless you put some oomph into it. If you organise a Movie Night for the weekend you can encorporate the following activities into it:

Decorate your own pizzas
Pop some corn (or make other snacks)
Make your own cinema tickets or posters

If you are doing this on a weekend I would leave out the majority of creative activities (the only one I recommend is the pizza decorating as the majority of this prep work can be done in advance or even shop bought).

Make it extra special: pick a theme. And if everyone cannot agree on the movies to be watched then plan additional nights to accommodate everyone. This is FAMILY time after all.

Turn off phones & other technology that will distract attention.

Dim the lights, get out the cosy blankets, open the packets of snack and enjoy.

NOTE: I’m not recommending this every night of the week so snacks like chocolate are more than welcome as a treat (you’d buy a pack at the cinema wouldn’t you?).

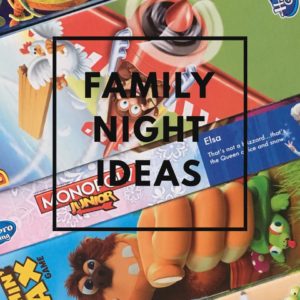
1) Board Games Night

I love Monopoly. I’m competitive and love a good session of Buckaroo, Pop up Pirate, Connect 4, Ludo and beyond. I am an 80s baby and we know the true meaning of board games!

It’s hard to picture children cherishing board games the way my generation did. However that shouldn’t put you off. Dust off the board games in the attic and create a bit of friendly competitive spirit amongst the family.
Of course if you don’t own any board games and you want to try this you have options:
Ask friends and family if you can borrow their games
Check out carboots/flea markets/eBay/Gumtree for a bargain or three
Purchase new versions of the classics (more money so make sure your family are actually going to participate).

Get some snacks (food you can eat with your fingers and not need to sit down as a table work best) and some fizzy beverages (or still if that’s more suitable) and turn off your phones. Reconnect with your own childhood and share the magic of pre-technology life.

My top recommended games for children under 9:
Operation
Pop up pirate
Connect 4
Mouse Trap
Buckaroo

Older children may enjoy:
Cluedo
Monopoly
Game of Life
Charades

NOTE: cheaper versions of famous classics can be purchased for nearly half the price of new games in UK stores such as Home Bargains.

Digital Games Night

Now it’s 2017; avoiding technology as a family is impossible. If you have access to a games console the why not organise a family games tournament?

You’ll need some games (ideally ones that get you up and moving about. My personal favourites are the Just Dance games). Draw up a table and get playing.

For this to work you’ll need to ensure you have enough space to move around (so you don’t end up smacking little ones in the face with remotes-it’s painful trust me).

You’ll need your drinks and snacks as before.

If you you a console but not many games eBay have some great second hands going for less than a fiver. Check out Amazons market place too. And don’t forget your own local charity shops.

Family Cooking Night (ideal for Weekends)

No I have not lost the plot. Just hear me out. If you want your children to get into the habit of eating fresh food, be able to cook and prepare it and clean up after themselves who do you expect to actually teach your offspring these KEY SKILLS?
Exactly. No one else will do it for you so if your children are old enough get them into the kitchen to help.

Here are some of the task younger children can help with:

Planning the meal
Cutting up spring onions/bacon/lettuce using safety scissors
Whisking (cream/eggs etc)
Setting tables
Making salads & dressings (screw top lidded bottle or jar would be useful).
Wiping down surfaces
Clearing away tables

If you are keen to encourage cooking habits maybe you can invite family over to join you (how about treating Gran?).

Pick a menu that is easy to prepare and cook. Save five star mitchelin meals for when you are trying to impress the in-laws. Don’t expect perfection from day one. This is about the time you spend together just as much as developing your children’s skills. Enjoy the time together. Children grow so fast (kinda like mint….).

Indoor Camping Adventure (ideal for weekends)

So if you have adventurous souls in your family but they don’t like the idea of creepy crawlies in their sleeping bag this idea is for you.
Create an indoor camping adventure.
You’ll need duvets, blankets, sleeping bags, torches, and a CD/Mp3 player/Tablet. If you have fairy lights dig them out and decorate the room with them too. Younger children may wish to bring a ‘guest’ in the form of a teddy bear.

Food wise here are my suggestions:
Hotdogs
Sausage and beans
Jacket potatoes/potato wedges
Chili con carne
Smores
-anything that is connected with the outdoor camping experience

Activities:
This one is all about imagination. So you’ll making up stories, or telling stories you already know. There’s also shadow puppet making, urban legend stories you can look into and even building a tent from bedsheets.
If the night is clear you could even go star spotting.

Why do we need a CD/Mp3 player/tablet?
To create an atmosphere. You can save/download woodland sounds which you can play in the background of your adventure.

So that’s my top 5. There are plenty of ideas out there (check out Pinterest for more inspiration). The most important thing to remember is you are spending time together as a family. It’s about quality of the time spent. It’s about creating memories. You are not in competition with anyone else to give your family the best of you.

So what is your families favourite way of spending the evening TOGETHER?


How to create a Master To Do List

Alliyah Dawud
October 24, 2017

How to create and manage a Master To Do List

That endless to do list. It gets under your skin. You feel like you are constantly trying to fight the need to do things and little gets done. Urgh. And every week just as you think you can cut something off the list you need to add another nine. Oh dear. Life is like this. It’s a mountain of tasks that never seem to get completed.

We see all this posts of organised women showing us beautifully crafted completed lists (on equally pretty notepaper). We cry into our soggy cereal with our so-called waterproof mascara running down our full foundation faces.

So really apart from selling your kidney and paying a temporary PA to come and work for you is there any real way of combating the To Do List dilemma of the 21st century lifestyle?

You betch’ya!

Really? And you don’t have to research the dark market and sell your organs either! Yay!

Welcome to the world of Master Lists. A Master List is simply but a list of tasks you need to complete. They could be tasks such as ordering wallpaper, getting someone to fix the driveway gate, order Birthday cards….everything you need to do. You put these all on a list that is designed to be a running list. In other words you won’t ever complete the list in your lifetime. Scary thought but it’s being realistic. We all have responsiblities and our tasks are always being added to. So this list is basically the list that will help you create weekly more manageable lists you will be completing.
So this list holds all the tasks you need to do, with an ideal projected date that you want the task completed by.

My list also has additional notes on it. E.g. I usually buy presents throughout the year so I record the location of items in the book. You could also colour code things to make things more organised. This is about making your life easier so modify it to reflect this.

So what do you need?

The ideal list is below:

2X notebooks/jotters/list making notepads (I use an A5 notebook to create my Master list and a smaller one for my weekly list)
NOTE: If you are self employed and wish to create a list for work too double the supplies.

Additional notepad to make notes etc/Sticky notes

Writing supplies

Your diary, calendar, or other time planning methods you use to plan your time.

PATIENCE

At least half an hour to get going (this is an on going project)

Getting started:

1)So you are serious about tackling this. Hurrah! First thing is first. Write down everything you need to do. Like literally. If you are creating a master list for work and home life you’ll need to write them down on the appropriate notebook/paper.

2) Now go through the lists. Is there anything on the lists that doesn’t belong there? Anything that needs doing immedately e.g. booking Hospital appointments or buying Grandmas birthday card and flowers for next week need to be put on an immediate list (you won’t be needing this once you get into the Master to do list system but to get you going you’ll need it). Is there something on your list that is on there because someone else is shying away from their responsiblity? Now is the time to delegate that task. Reducing the tasks will help you on the next step.

3) Now draw two lines down the page of your notebook that will be your Master List. Leave a large column to write the task. You need an additional column to record the date of when you wish to complete the task by and the final column is for ticking off the task.

4) Transfer your tasks to the Master to do list. That’s everything! EVERY.little.thing.

5) Now look at your schedule for next week. How’s it looking? How much time do you realistically have? Got a number? Great. Now comes the big part….

6) Look at your Master to do list. Look for tasks that can be completed in the time you have available and write these tasks on your WEEKLY to do list.
By understanding how much time you have and not over stretching yourself you are reducing the chances of failure and increasing the chances of things getting down.

7) By the end of the week you should have completed your weekly to do list. Tick off anything you’ve completed. Anything that hasn’t been completed can either be re-added to the Master to do list or to the follow weeks list.

8) At the beginning of the week (or on the day you do your weekly planning) create next weeks list.
NOTE: you’ll also be adding things to your Master list. RELAX. This is the idea. The Master List is continiously updated. The idea isn’t to complete everything it’s to be in control and understand what needs doing.
Your weekly list (that you’ve created from your Master List) is the list that will be completed on a weekly basis. This list helps you chart your progress too and gives you a sense of goal completion.

9) Repeat the above steps until it becomes habit or you find another system that suits you better.

Additional notes:

This system can work equally well for couples and families. If you are creating a master list for families you can create weekly lists for family members too.

If you’ve been living in an ocean of incompleted to do lists for as long as you can remember don’t panic if it takes a while to do used to this system. Keep it up for a month and evaluate if it works for you.

Any comments or question; let me know.


Meatfree Monday…Carrot Burgers

Alliyah Dawud
October 23, 2017

Carrot Burgers (Meat free Mondays)

The humble carrot. Apart from being a key player in Carrot cake (and being served in sticks with hummous) does it really get the press it deserves?

So here I present to you….Carrot Burgers. A great vegetarian alternative to the soya mince burgers. You could make a batch and freeze them (post frying) for a quick midweek meal option.

Ingredients:
4 medium carrots peeled & coursely grated
1 egg (whisked)
1 heaped tablespoon chickpea flour
1 TSP ground coriander seeds
1 TSP ground cumin seeds
1 small onion (I used red) diced
1 TBSP yogurt
1 TSP garlic salt (or plain salt if you don’t have it to hand)

Oil-for shallow frying .

1) Place the carrots in a large bowl. Add the onion and stir through.
2) add the salt, coriander seeds, cumin seeds and stir to distribute through the carrots.
3) Add the egg and yogurt and stir to blend all the ingredients together.
4) Add the chickpea flour. Stir it in. You should now have a gooey mixture.
5) Heat the oil in a pan.
6) With wet hands divide the mixture into 4 and create burger patties.
7) Shallow fry for 3/4 minutes on each side.
8) Drain on kitchen paper.

Note: I’ve had no problems with the formation of these burgers. Some may prefer to form these burgers and then place them in the fridge for an hour before frying. However the egg and chickpea flour are very bindings.

To serve:

Burger buns
Lettuce
Sliced Cheese
Fried mushroom slices (optional)
Sweet potato fried (optional)
Fries (optional)
Relish or Ketchup
Fried Egg (optional)

To assemble the burger:

Warm up the burger buns. Add some ketchup or relish to the burger buns. Add the burger fillet and the slice of cheese. If you like your cheese melted you can zap the burger in the microwave for 20 seconds. Add the sliced mushrooms (if using) and the lettuce. Place the burger bun top on top and serve with fries (or a side of your choosing).


Chocolate Concrete Cake

Alliyah Dawud
October 19, 2017

Chocolate Concrete Cake

So if you were an 80s baby in England and attended mainstream public school there’s a huge possibility you will remember hard slabs of cake like substance served with colourful custard. The cake was fondly knows as concrete cake a nod to it’s hard texture and make up. But once you left it in lashings of custard it turned into this soft delectable delight. My old School could cut it into rectangular slabs (and sprinkle on some extra granulated sugar).

Recently my oldest asked me about my memories of School. The one thing that was apparent was I blocked out a lot of stuff (perhaps due to the constant bullying the Schools chose to ignore) but what I can remember is the delectable desserts (I was a foodie in the making from a young age). So recently we tried a few recipes and this one below in my opinion smells and tastes like the retro School dinner classic.

Don’t forget to serve it with colourful custard. I used instant custard with a bit of food dye added. Yes this is a treat so I didn’t mind injected my children with nasty food colours.

Preparation time:
10 minutes

Baking time: 30 minutes

Servings: 8 slices (easy!)

I used a 20 cm shallow pie dish to bake the concrete cake. You can use a sandwich cake tin if that’s what you have on hand. Grease the tin with butter/oil.

Ingredients:
200 grams plain flour (shifted)
200 grams granulated sugar (that’s right-granulated!) plus a little extra for sprinkling on top
60 grams cocoa powder (shifted)
110 grams butter (or substitute that is suitable for baking). softened. You could soften it in the microwave if you wish.

1) Mix together the flour, sugar and cocoa powder.
2) add butter. Stir. The mixture will start to look like breadcrumbs. Stir until all the ingredients are thoroughly.
3) Now tip the mixture into the greased baking dish. Pat down.
4) Bake in the oven at 180 c for 30 minutes on the middle rack.
5) Take out of the oven and either: allow to cool down completely (which is what I do). Or cool enough to remove from pan, slice and serve (warm). Don’t forget to sprinkle on the sugar.

I allow the concrete to cool over night. I then remove from the pan and slice. Serve with some bright coloured custard. And enjoy the walk down memory lane.
PS: if you do end up with any leftovers store them in an airtight container and you’ll be good for 4 days.