The BIG holiday survival guide (As written by the Mama of a 5.5 year old and 8 year old).
NOTE: I am publishing this article just before the Easter Holidays so you have at least SIX weeks to get your butts in gear. I’m nice like that!I’ll be honest with you; I’m pretty much winging this parental business to a T.
And when the big 6 week Summer break hits boy am I panicky and jittery like a coffee addict in Ramadan. After spending a few years being disorganised and crying tears of joy come the beginning of September I came up with a system to keep my sanity. I’m sharing my tips, systems and other bits with you guys below.
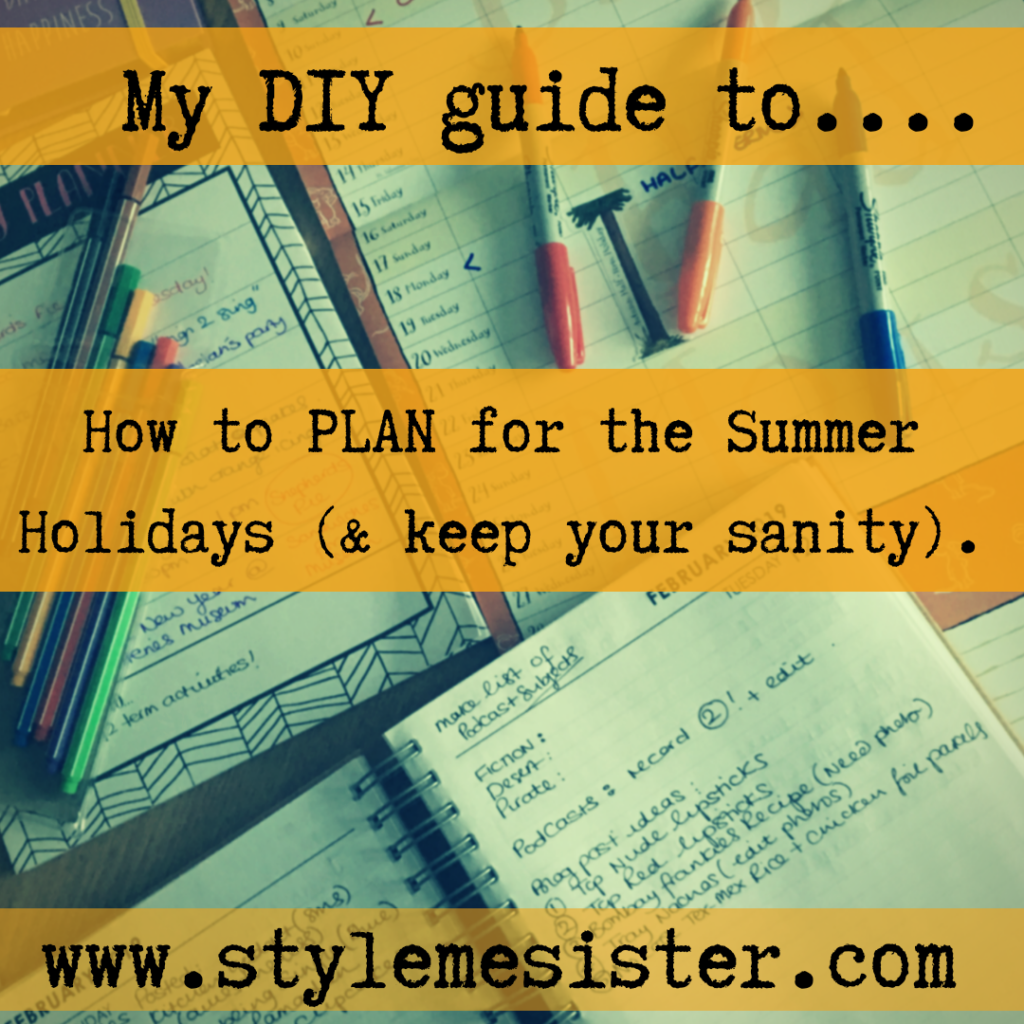
First things first: find out as far as you can in advance what the holiday dates are. Get hold of a calendar that has enough space to make notes on. I love the 18 month Gruffalo Calendar which I get off Amazon as there’s a column for each of the ladies in the family. The Book People also do great calendars (and usually cheaper too). Put all key dates on the calendar e.g. Birthdays, holidays or when the children will be visiting the other parent etc.
Work out any budget restraints you have for the holiday period. This is vital to ensure you don’t over promise and under deliver (I usually don’t tell my girls what the plans are until the actual day to stop any over excitement). Make a list of all the activities and places your kids love. If you use social media go onto the companies pages and follow.
Sign up to their offers. A lot of companies send out exclusive offers and its vital to be on the lists to get the information before others. So for example my girls like Trentham Gardens so we follow them on Facebook. They also like Safari Parks so we follow them too. That way we never miss any events or offers.
My girls love the following: Outdoor events Music Films Cooking (& baking)Books Gardens/Parks Theme Parks Theatre Themed events where they can dress up.
History (Museums)Arts and Crafts Currently we are located in a small town in the middle of Birmingham (my hometown) and Manchester (my adopted hometown) called Stoke-on-Trent. This city is also known as The Potteries and has produced more Pottery than anywhere else on the planet.
History buffs will love to know Reginald Mitchell was a local lad (google the Spitfire). There’s some really beautiful gardens around too (Trentham Gardens, Biddulph Grange Gardens) and for Theme Park fanatics (guilty) there’s Alton Towers (also good for history buffs and those that love gardens) and Drayton Manor (where you’ll find Thomas Land).
There’s also loads of natural beauty spots such as Dimmingsdale and Mow Cop Castle ruins. Stafford is less than 20 minutes by train and it has one of the most beautiful spots you have ever seen (Victoria Park).
We have a great Library and Museums that organise regular events for children throughout half term and the big holidays. It’s a blessing that my children love books and crafts too.
Birmingham and Manchester are less than an hour away by train or motorway.
Liverpool is around 1 hour 30 minutes by train.
Blackpool is around the same by train too.
London is less than 2 hours by direct train.
And Rhyl is around 1 hour 45 minutes by train.
All in all we’re quite central to so much. So based on my children’s likes I follow the following on Facebook:
Stoke-on-Trent Libraries
Stoke-on-Trent Museums
Ford Green Hall
Stoke-on-Trent Park services
Stafford Gatehouse Theatre
Alton Towers/Merlin Passes
Birmingham Museums
Manchester Museums
Manchester Parks services
Manchester Arena
Trentham Gardens
National Trust (which covers lots of venues around the area including Biddulph Grange Gardens).
I am also subscribed to the Enjoy Staffordshire website newsletter. Once I know what events are happening I mark them ALL all on my calendar (even ones that clash so I know what is actually happening across the city and beyond).
This is essential. Why? Because events can get cancelled and the great British Summer can be anything but predictable so its always worth having a plan B.I’m then able to see how many potential outings we can have a week. I then look at costs. In some cases it’s cheaper to opt for an annual pass if you plan to visit a venue multiple times.
I then list what I would like a week to IDEALLY look like:
2/3 x outings (some events are on the same day so we may get more out of the actual day)
1 x cooking/baking activity (I gave the girls cookery books aimed at their age ranges and asked them to place sticky notes on the recipes they wished to try. I also use I can cook recipes off the BBC website).
1 x crafting activity (Top tip: if you use Pinterest create a board to pin ideas to so you know what you’ll be doing and what materials you need in ADVANCE).The girls spend one day with their other parent so I need to factor that in. That leaves two days as potentially free for play dates or free play. This schedule works for us; however this much activity may not work for you. Find your balance. Unless we go on a day out activities generally last up to 3 hours (craft sessions at the Museum etc around an hour or 90 minutes tops). Considering the time of the activity I then make a note of if we need packed lunches (or a picnic if the weather is good and there’s a park nearby). I then fill out a weekly summary sheet. This contains the following information:
What activities and events are happening that week Any day trips we are going on (e.g. Stafford Gatehouse) Do need to buy tickets in advance/do we need annual passes etc If we need packed lunches Weather predictions (roughly) Any specialist clothing required What time we need to be ready for Do we need lunches Any materials or ingredients needed for cooking or crafts activities. Any additional notes.
Sounds like a lot of work right?
Well I created an A4 sheet and simply complete that. It took me around 3 hours to plan out the 6 weeks.
BUT it’s now all planned out. It also made it easier in case their Nana had to step in for me (everything is mapped out).
Of course plans can change; for us though it was important to get the bulk of things down and planned for my own sanity.
Post holiday review (what worked and what didn’t): First thing that I want to say is children all mature at different ages. Suddenly the Library and events there were too ‘kid like’ for my oldest which threw a spanner in the works for me as I had a few of their events on our calendar. So that’s something I need to consider next time.
Having the opportunity to try different things and knowing what was happening in the local area proved a huge blessing.
It stopped us from having dull weeks.Next year we will be scheduling visiting friends at home to just watch a movie, go the park etc.
Sometimes it’s the company that matters more than the activity.Children get tired so we ended up spending days doing NOTHING. Just to recharge our batteries. The girls enjoyed free play in the garden.
We found keeping toys in the garden in those outdoor storage trunks helped the girls spend more time outdoors. Our best investment during the holidays was our membership to the National Trust. We bloody love their venues and events they hold.
Crafty stuff always proved popular. We didn’t have many wet days however we had various activities on standby. My system worked for us. I’ll be using this system for holidays (including the one week half terms we get in England and the Easter break).
I thoroughly recommend the Gruffalo Family Planner as it comes with stickers and has plenty of space to write things in.
What do you guys do to stop yourself stressing in the big break?
I don’t wish to brag but I can get about the UK on the Train with the girls for a 1/3 off! And if we use the Train there’s no worry about whose driving and the girls can pretty much play, read, colour and do whatever (as long as we access to a table) and I can sit back and listen to an audio book-result!
Anyone that knows me well knows how I used to find it stressful travelling (and preparing to travel) with my children. It was an utter drag and well I disliked it a lot.
Soon after becoming a new me (e.g. not letting the little things in life bring me down) I discovered that some simple ‘systems’ and preparation (including my favourite LISTS) would help me feel calmer; much much much calmer.
Nowadays I don’t think twice about hopping on a Train with the girls to go visit friends, Museums, Parks etc etc. I just get up and go. Of course a bit of forward preparation never hurt anyone in my opinion so I do have a few organisational hacks that help for example:
1) I have a basket with ‘snacks’ in so that if we do go on a trip somewhere on the Train the girls simply get a few snacks out and pack them….
2)…in a designated backpack we use on our day trips. We keep this page for this purpose only. No other toys, snacks etc enter this bag. End of story.
3) I have a selection of colouring books and pencils we take on the train and these are kept separate to the girls other items. We grab them, pack them and we’re done.
4) On longer trips we pack 2 Barbies each to play with on the train.
5) We ALWAYS pre-book our tickets. I’d rather not have to look for seats on a crowded train and I have had to kick people off our seats before but in all honesty I don’t care; I paid for something. It’s mine.
On longer trips we pack a ‘picnic’ for the train and depending on what time the journey is we pack different things. So if we’re travelling early in the morning we’ll pack stuff like Turkey rashers, Breakfast Burritos etc. If it’s a lunch time trek then sandwiches. I generally try to avoid being on the trains at night because trains are usually more full than a cattle barn.
So a third off rail fare? How is it possible? We have what is known as a Friends and Family Rail Card. You need a child to get one of these bad boys (and the child must travel with you to get a third off fares). The card costs £30.00 a year and basically saves you on pretty much every journey you take (some terms and conditions apply but I’ve not had any issues in the 14 months we’ve had one).
We’ve been plenty of places and plan to continue to use the Trains for stress free travel. Our favourite places to visit include Blackpool (one train change and that’s it!), Liverpool (direct Train), Birmingham (home!) and of course my second home Manchester!
But the most important place we visit is….St Neots. With my girl gang member living in Cambridge (St Neots) it’s a fair trek by car….so we love the fact we can travel to see loved ones and the journey isn’t taxing or tiring.
One of the blessings of the card is you can elect two adults to be names on the card. I have my own name and my Mothers name on my card. You could nominate someone that spends time with the children (an uncle, grandparent etc etc). I know there are families where one spouse uses their family car for work so it’s useful to have an additional transportational method especially during summer holidays to keep the children occupied. Trains work well. I know Trains get a bad wrap because of costs, delays and improvements but in all honesty if you can see past that get yourself a Rail Card and go have some fun (and who knows you may get to listen to that audio book you’ve been meaning to listen to for ages!).
My best friends live around 3.5 hours away from me by train. We change trains a few times (usually 3 times each way) to get to our destinations and the journey can be tiresome (and boring for the girls) so I try to keep them as busy as possible on the journey. Here are my TOP ways.
Important stuff to NOTE:
Travel Sickness is REAL
factor in travel sickness guys. We always wear anti sickness bands and try to sit near the toilets ‘just in case’. We also carry extra bags in case of sickness too.
You can pick up anti sickness bands for around £3.50 per pair on eBay. Worth their weight in gold; in GOLD.
Book in advance if you CAN: It saves mad rushes in the morning. I prefer to buy my tickets in advance and I usually pick them up in advance too. I don’t like using an App if I’m travelling the girls as I don’t want tears (of my own) if I lose internet connection or something else.
Wifi on some trains is FREE. On others they will charge you. I’ve yet to meet a stable Wifi connection that was fast and signals often ‘drop’ on trains so I do not rely on any form of entertainment that is linked to that to save myself the headache of having the girls complain about ‘it not working’.
Hydration!
Oh and don’t forget water to remain hydrated. In hot weather I actually freeze disposable bottles with water in which helps keep water cool. If you do this wrap them in a teatowel before placing them in your bag.
I prefer disposable bottles for travel as it’s one less thing to worry about (e.g. I don’t want tears from a favourite bottle being left of the train).
But I don’t need the TOILET:
We’ve all heard this haven’t we? I get the girls to take a tinkle in each station we stop at. We usually find our platform first and then go to the bathroom.
How I keep my sanity on train rides…
Firstly I don’t allow the use of tablets. The internet cost on Virgin trains is high and if you are streaming videos its slow and well; expensive. So I encourage screen-free activities.
I break down activities depending on how long that ‘leg’ of the journey is.
To make the journey fun we pack a Breakfast picnic. That’s correct guys a picnic for breakfast. Bare in mind the first train we board is usually around 7AM.
Breakfast Picnic on the Train (it’s a part of the adventure)
I prepare breakfast wraps (egg, spinach, cheese etc), sausages and hash browns the night before. I then warm them up in the morning and wrap them in foil and pack them up in the morning. We also take ketchup sachets and juice boxes to make life easier. Wet wipes help to clean fingers (and the table) post breakfast too.
I also pack some cereal bars too (which we usually avoid because of the high sugar. They do however make a convienent snack on trains).
Two of their favourite Barbies can come along for the ride….
The girls pack two of their favourites Barbie dolls EACH minus any small accessories to avoid tears when things get lost. The girls understand the rule and it’s easier all around when there’s minimal toys to worry about.
Music….
My girls really are their Mothers daughters and love music. I have created around a 2 hour playlist of their favourite songs (Bieber, Taylor, Little Mix etc) and have it on an old fashioned Mp3 player. I also have a headphone splitter I connect to it to save tears on whose ‘go it is’. The girls then have the option to listen to a few songs. I purchase cheap headphones for the journey (from Poundland in the UK) so if they do get lost it’s no big deal.
Snacks….
Food and drink on trains costs a lot…I mean I found the prices on Ryan Air to be reasonable but Virgin Trains when you are travelling with kids?! We calculate how long we’ll be on the train and pack around one snack per half an hour. Snacks can include small chocolate bars, crisps, fruit, crackers etc.
I also pack a lunch style box with olives, cheese cubes and crackers for them to graze on (which helps to keep sugar intake in moderation).
I also pack a few extra bits ‘just in case’.
TIP: places like Tesco do ‘long life’ packed croissants. They work out well for journeys too.
Activity/Colouring books
I generally pack 2 each of these for the girls (And they are usually new so it’s like a gift). I get a set of pencils from poundland (so if they do get lost again no tears). These are great for children who need a bit of variety.
Travel board games (which are either magnetic or have no parts to lose e.g. Guess who).
My girls love board games (so do I!) so this is one of our favourite ways to keep the girls entertained for at least half an hour. We pack travel Guess Who and a 4 in 1 magnetic draughts/ludo/chess/snakes and ladders too.
You can pick these up on Amazon for around £5.00 each (the magnetic board game that’s a 4 in 1 is a REAL bargain even if you only play ludo and snakes and ladders).
And that’s about it…what do you do to keep children busy while you travel? Drop your tips below.
Versatile decorations for Eid, Ramadan and beyond.
Don’t you just love it when Christmas decorations land in shops in July. No really. I’m being sincere. But why would a Muslim be excited about the decorations that spill out of every single shop on the High Street?
Because we’re living in an era where most decorations can be used across religions, cultures and beyond.
How is that possible I hear you cry. Well firstly the decorations market is becoming more and more competetive as social media sites such as Instagram show us how ‘the other half lives’ and well we all want to buy decorations that truly are awesome, unique and non standard in the traditional sense.
When I was a kid I remember tinsel, tinsel, more tinsel and red and white decorations. Gold was also a feature colour. But that was the colour palettes the general consumer worked with unless they became creative and produced their own decorations (in an era before Pinterest trust me this was very very difficult).
I love decorating my home for Eid, Ramadan and Birthdays. I just love bringing in magical vibes for the girls to get lost in. So I’ve created a list of my top 10 decorations that are fit for a variety of celebrations.
Make a list of what you need and when the decoration season hits fill that basket with a bargain or three of versatility.
NOTE: shops have already started slashing prices guys! So see you all on Boxing Day to get our decoration fix.
1) Beaded garlands.
Without a shadow of a doubt this is my top decoration. You can pick up beaded garland in an array of colours. We currently own a bucket of gold beaded garlands plus pink and purple. We also have some white ones (for Frozen themed parties). Now I use them: hang them up, wrap them around things, use them to hang up lanterns…get creative. Why I love them: they are so versatile. Plus they are cheap and durable. Poundland bring in a range of colours every year. That’s a quid for 8 metres. And if you are looking at topping up your collection you can pick up garlands for as cheap as 25 pence in the post Christmas sales. That’s right. How do you think I ended up with a bucket of gold beaded garlands?
2) Paper lanterns Oh my goodness. This is where my Pinterest obsession creeps in. Years ago I came across an image of a Tangled themed wedding and they used various paper lanterns to decorate the gazebo. It looked magical. The next thing you know I was ordering various lanterns in various colours and sizes. So as these lanterns are made from paper you cannot use them with candles (just thought I would point out the obvious) and due to the material they can be delicate to handle so you need to bare that in mind. However since I first started using lanterns 4 years ago I haven’t damaged a single one beyond a bit of TLC. Now to use them: assemble them (straight forward procedure so don’t panic) and hang them up. If you want to create a magical airy look use transparent thread. Why I love them: the instant pop of colour! If you need to decorate a large area you can get some pretty big lanterns and hang them in clusters (in a mixture of sizes) to create a bit of a feature. The combinations are endless if you mix them up with honeycomb balls and paper fans. Plus if you look after them you can REUSE them! My top tip: want a bit of extra bling for an outdoor event? Spray the lanterns with glitter spray. The glitter will glisten in the sunlight. I usually order mine 6/8 weeks before I need them so I can order them cheaper from China.
3) Honeycomb balls When my oldest turned one I ordered pink honeycomb balls and at the time places like Poundland didn’t stock them so I paid a silly price per ball. Anyhow 7 years in and those honeycomb balls are still being used. The honeycomb balls get their name from their pretty shape. You can buy honeycomb balls (made out of tissue paper) in a wide range of colours and sizes so there’s something to fit every budget. Why I love them: the range of colours and sizes available readily makes these babies a must for me. Plus if you fold them back up and store them carefully they WILL last (like I said I’ve had some for 7 years…). Tip: if you require larger sized honeycomb balls and want to grab some at a bargain try eBayers in China.
4) Glitter covered branches.
So if you cannot take glitter avoid these guys. But if like my family you need a bit of bling these are worth their weight in gold. Basically dried branches are painted and covered in glitter. You then take these beauties home and place them in a vase and great a centre point for your table, mantle etc. I bought a range of colours in the post Christmas sales. I drape beaded garlands on the branches to add some extra bling. You can mix and match to make a statement. Why I love them: its a big statement piece at an affordable price. I paid £1.25 for a bunch of branches from Asda post Christmas. They can be reused too. Tips: planning a mendhi? Why not get green branches and drape over gold beaded garlands as the centre piece for tables.
5) pre cut foil letter banners I love a good DIY project but I find some things are cheaper to purchase readymade and in the case of Foil/glitter card signs. If you calculate the price of card, plus the time it takes to cut the letters out etc buying pre-made is a bargain. I use Eid Mubarak glitter letter signs to create statements at Eid. I got 3 signs from eBay for £4.68 (the seller was based in China and I placed my order 2 months in advance). Why I love them: simple statement really. Affordable and reusable. Plus I like to have signs in photos incase I suffer from memory problems when I’m older.
6) Fairy lights Oh dear lord. Fairy lights! I don’t think these need much of an introduction but with such a variety there’s so much scope with them. Drape them around the home, hang them up, use outdoor ones draped over plants…the possibilities are endless. There’s colourful lights, twinkling ones, solar powered outdoor lights, flashing ones…ones you can connect up to speakers. What a time to be alive if you love fairy lights. Why I love them: just re-read the above. Tips: Superstores often have offers on around Christmas and you can actually pick up bargains before the post Christmas sales.
7) Paper mache pre-made letters If you have lots of shelves or a mantle that needs a bit of festive love this could be a cost effective option for you. I bought my letters off eBay and paid £1.20 per letter (with an additional 15% off for buying 10+ letters). I then painted the letters using metallic paint (purchased from Poundland-I can recommend their metallic acrylic ‘poster paints’ as I’ve used purple, gold and turquoise from the range). The project took a total of less than 2 hours and I now have a set of awesome freestanding letters than look awesome on my shelves. Why I love them: you can spell whatever you want to. And you can use any colour, use a bit of glitter…and let your imagination run free. Tip: a great crafting idea for little ones to get them in the festive mood and let them participate in the decoration of the home for any special event/festivity.
8)Painted upcycled jars (as candle holders) I love a good DIY project so this was right up my street. I collected a range of glass jars and painted them in a range of jewel coloured glass paints. I use these holders with battery powered ‘tealight’ candles so I don’t have any major fire hazards to worry about whilst celebrating. Plus I don’t have to scrape wax out of the holders (less work!). Why I love them: I can use the jars outdoors and indoors and the glistening lights look magical. Plus the colour range of paints is amazing. Tips: keep the jars in your shed/outhouse during colder months as frost will damage them. Get children involved in painting jars. If you have a steady hand try using glass outline pens to draw on patterns. The possibilities are endless.
9) Baubles The old fashioned bauble has withstood the test of time. You can pick up baubles in all colours, textures, shapes and sizes too. You can hang them up, place them in vases, stick them to a hula hoop and create a large wreath….get creative with these babies. You can also create personalised bauble countdown garlands by writing on the baubles too (e.g. 6 sleeps til Eid…. etc). Hang some baubles with ribbon and hang them in your window. Why I love them: baubles are a cheap and effective away to add colour and texture to your home and decor collection. You can get creative with them too. Pick up boxes of baubles from Superstores and DIY stores such as B&Q in the post Christmas sales.
10) Wire decorations Again I love DIY and garden wire based decorations are one of my favourite things ever. Firstly you can get really creative and let children join in. Secondly wire is really affordable (especially if you use garden wire) and thirdly you can create decorations for the garden that will last a while. My favourite things to create are cressant moons and also letters too. I wrap them with hessian string (again super affordable) and then paint them (our favourite: gold paint). Intertwine with fairy lights and create something magical.
That concludes my list of decorations I recommend for your decoration box. I delibrately left off balloons as yes they are super cheap but cannot be reused.
What is your favourite decoration? And what would you rather be without? Leave a comment below.
I cannot be the only one that looks for ways to add the magic of Ramadan and Eid to the lives of those around us. I also cannot be the only Mama who looks for ways for her children to share this blessed and magical time with their friends and Teachers either.
As my girls get older they are noticing more and more that a lot of attention is given on a global scale to Christmas. They also notice that gift giving/baked goods and other little items are distributed a lot during the festive period.
So this year I put a bit of effort into my children’s light Dawah on the playground. That’s right; I classed this project as Dawah. Because even though there isn’t any spoken words to this we are paving the way for conversation. And we are also spreading kindness. Dawah in my book doesn’t have to be about preaching. It’s also about creating opportunities to discuss things.
So why am I posting this recipe so close to Christmas? Well I don’t see any reason why you cannot distribute these cones for Christmas too.
So to make 12 cones of pure yumminess (that took me about an hour and a half to actually do) you will need:
Ingredients:
500 grams popping corn (plan stuff available in most supermarkets and is actually quite cheap)
4 TBSP oil (sunflower works-no need to go fancy)
For the caramel:
600 grams sugar (I used a mixture of what I had in the house-which was soft light and dark brown sugars)
550 grams of butter (feel free to use salted)
Sea salt (crushed) to taste.
4 TBSP honey
4 TBSP double cream
To wrap up:
12 x cellophane cone bags (I purchased these in a set of 50 as I have other projects coming up)
12 x wire twists to fasten the cones
Stickers (optional-we bought Eid Mubarak stickers off eBay. I’ll be using personalised ones for the Christmas cones we are distributing too).
Equipment:
2 large baking sheets (or 3 smaller ones). Line with greaseproof paper. I prefer to use the sheets that are used to make tray bakes etc as they have high sides which prevents popcorn falling off.
1) You need to start by popping the corn. I popped the corn in batches. I placed 2 TBSP of oil in a large pan and heated in a large pan and add 150 grams of corn. Give it a quick shake and place the lid on. Now is the fun part. You need to listen to the corn pop. This takes around 5/6 minutes. Give the pan a shake (carefully as it will be hot!) during the 5/6 minutes to stop the popcorn burning. Once the speed of the corn literally dies down (again around 5/6 minutes in). Turn the heat off. Give the pan a shake. Do not remove the lid just yet in case you get hit by a stray popped corn.
2) Repeat step 1 until all the popcorn is popped. Remove any cernals that haven’t popped (chipped teeth are not in vogue). Place the popcorn to one side. Now make the caramel.
3) As there’s a lot of popcorn I make the caramel in TWO batches. I find this the best way to control the situation.
Heat half the butter and half the sugar in a medium pan. Stir the mixture to prevent it burning.
Cook over a medium heat until the caramel is formed. Now by this I mean you’ll literally see a sticky, brown liquid lava in the pan. Now add 2 TBSP of honey and stir in. Reduce the heat to prevent burning. Now add the double cream and stir until combined. Allow to bubble for a minute. Turn the heat off. Allow to cool for a few minutes. It will still be hot and you need to be careful not to scald yourself as hot sugar is dangerous.
4) Now comes the messy yet slightly dangerous part. You need to add half the popcorn to the caramel. Stir well to cover as much of the popcorn as possible. Now divide up the mixture onto the trays and spread evenly. Sprinkle on salt to your taste.
5) Bake in an oven at 170 for 15 minutes. Turn the oven off and allow to cool completely. Don’t worry if you peak at the popcorn whilst it’s warm and the mixture looks like it’s melted. Once its stone cold it’s set and will be yum. Hold the vision; trust the process. Always.
Now repeat the above steps to make another batch of caramel/caramel popcorn.
Once the popcorn is cold you may wish to break up the clusters to bag them up. That’s fine. Place in the bags and fasten. Add labels/stickers as you wish.
Any leftover popcorn will keep well for up to 4 days in a ziplock bag/airtight container.
Distribute with pride.
Enjoy.
Note: this popcorn is high in calories and sugar. In case you were wondering.