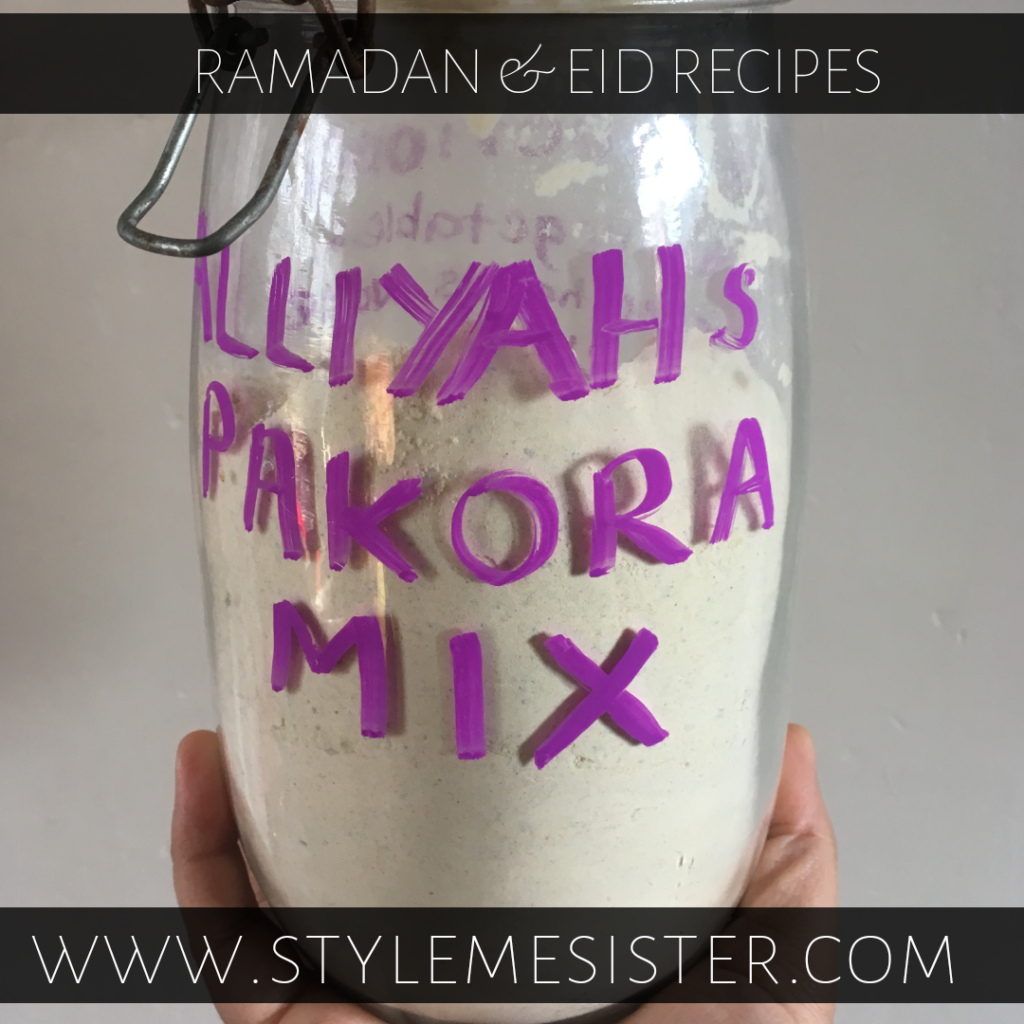
Alliyahs awesome (bulk) Pakora Mix

My bulk Pakora mix

Ramadan Kareem by lovely folk!

For many Asians Pakoras are an essential foodie item on the Ramadan schedule. I’ll admit that as a child I associated these golden nuggets of yumminess with the holy month.

This Ramadan I will be posting recipes I find easy, economical and a bit different to the standard Ramadan feasts we are so used to. And as someone who tries to make healthy eating a part of family life I want to provide recipes I use at home and have tweaked to make them slightly better than the mainstream counterparts. I also like the idea of ‘freestyling’ in the kitchen so I sometimes don’t have exact weights for ingredients just like the average Mama won’t whilst cooking to feed her brood.

I’ll also post shorter articles during the blessed month too. Feel free as always to share the blog posts with your nearest, dearest and folk who love food!

Nowadays I enjoy Pakoras when I want however I know many that spend hours preparing the gram flour mix during the month of Ramadan.

I’m here to suggest that you mix it all in bulk…and cut your work load. Literally!

I make a big batch of Pakora mix to save time and also money. Pre-mixed boxes work out more expensive. The only real convenience they bring to the kitchen is the fact all the spices have been added. That’s it.

Here is my recipe for my Pakora Mix. I’ve made up batches and used them over 2 months so I’ve had no problems at all. I’ve listed the spices I use as standard.

I don’t actually add ‘chili’ in the form of Chili Powder until I’m making a batch of Pakoras. This works for me as I don’t give my daughters lots of chili.

If you are avoiding salt then by all means adjust the recipe to reflect that.

To make a huge batch of Alliyahs Pakora Mix you will need:

4 cups of Gram Flour (that’s chickpea flour aka Basan) sifted into a large bowl
1 TBSP baking powder-sifted into the bowl
2 TBSP salt
1 TBSP dried coriander leaves (heaped)
2 TBSP coriander powder (heaped)
2 TBSP cumin powder (heaped)
2 TBSP carom seeds-whole (heaped)
1 TBSP garam masala powder (heaped)

1) If you haven’t already done it sift the basan (gram flour) and baking powder into a large bowl.
2) Add the spices and stir to eventually distribute the ingredients.
3) Decant the mix into a airtight container.
Your mix is ready to use.

I usually make a test batch of Pakoras so I know if I need to add more spices.

NOTE: to make the Pakora mixture I add 2 TBSP of coriander leaves (finely chopped up) to the mixture.

To use the mix:
There’s two ways I use this mix.

1) Make a thick paste (it should coat the back of a wooden spoon) and dip in your favourite vegetables and deep fry until golden brown.

2) Cut up your vegetables and add 3 tablespoons of the mix. Add a little water and mix to coat the vegetables and create a sticky mix. If the mixture is too gloopy add a bit of water. If you cannot see the Pakora mix and the vegetables are not coated add more mix. It’s a bit of trial and error depending on how much vegetables you are using.

Don’t forget to add some chili powder if you need something a bit more spicy.

Enjoy your Pakoras! What do you usually serve with yours? Drop us a message below.

Coriander and Lemon Potato Curry


I’ll be frank with you. I love curries but I get bored of the same old same old situation.
When the (former) Boss and I decided to have Lunch at mine I created what I would consider a Vegetarian Banquet. I absolutely love vegetarian curries. I believe they showcase how awesome and easy vegetables are to work with. Plus with my healthy food kick I am always looking at healthier meals. It helps that I love daals/pulses!

One of the curries I created was this one. Its a simple, frugal curry I believe is perfect for Spring and Summer as it’s lighter than other curries. There’s no tomatoes in this curry and that’s why it wouldn’t look like a standard red curry.

I serve this curry with plain boiled rice. It also tastes equally awesome the next day. It cooks in less than 30 minutes and children love it too.

This recipe is actually VEGAN. So to my vegan readers I hope this is music to their ears.

To serve 4-6 people (depending on curry portion sizes)

400 grams (baby potatoes work, as do standard potatoes cut into rounds that are pound thickness).
2 RBSP rapeseed oil
1 large onion sliced thinly
5 cloves of garlic-crushed
4 TBSP fresh coriander (including stalks) chopped finely
2 lemons-juiced
1 TBSP coriander seed powder crushed
1 TBSP cumin powder
Salt-to taste
OPTIONAL: 1 TSP chili powder or 1 TSP chili flakes.
1500-2000 ml water (plain stuff from the tap)

To serve:
Lemon wedges (optional)
Yogurt (vegan to keep the recipe vegan)-optional
Plain boiled rice ( I use Basmati).

I assume you guys have prepared the ingredients as above…lets get cracking.

1) Heat the oil in a large pot on a medium heat. Add the sliced onion and fry until onions are soft NOT browned.
2) Add the potatoes and stir well. ‘Fry’ for 5 minutes stirring to ensure the potatoes don’t stick.
3) Now add the garlic and fry for one minute. You’ll be ‘hit’ with a shot of garlic scent. That tells us we are ready for the next step.
4) Now add the salt and dried spices. Stir well to coat the potatoes. If the spices start to ‘burn’ or the mixture starts to stick add 2 TBSP of water to the potatoes.
5) Add HALF the coriander. Stir well.
6) Now add 1500 ml (1.5 litres) to the potatoes. Bring to the boil and then reduce the heat and cover the pan. You need to cook the potatoes until tender. Now this will vary depending on which potatoes you are using. So after 8 minutes ‘test’ the spuds. I usually do this by carefully inserting a sharp knife tip into the potato. If it starts to fall apart its done. It its hard as nails you need to cook it more. I found my standard potatoes took 18 minutes too cook. Now you will be thinking why do you have water left over? Answer: if you want a more ‘runny’ curry you need to add all the liquid. If you prefer a drier curry stick to 1500 ml. Always remember that if water evaporates too quickly the potatoes won’t cook and you need to add more. It’s that simple.
7) Once the potatoes are cooked turn off the heat. Now add the remaining coriander and lemon juice. Stir through.
8) Serve!

I served with rice but you can serve the curry with Naans or maybe Parathas.

Store leftovers in the fridge and warm through thoroughly before serving.

Delicious.

Bean and Egg Burritos

Alliyah Dawud
April 26, 2019

Easy peasy spicy egg and black bean burritos (An awesome Breakfast)

Eggs are awesome. Not only do they cook fast but they are cheap, nutritious but are also versatile.

Black beans are magic. I bulk boil them and freeze them so I have a constant supply. I use them in tex mex dishes, Quesadillas, salads, rice bowls and these awesome Burritos.

If you use freshly boiled beans you can make some extra Burritos to freeze so you always have a hot Breakfast on hand in the freezer. Plus these bad boys are healthier than a lot of the ready made stuff you can pick up at certain fast food places.

This is a great recipe to use for bulk preparing Breakfasts.

To make two of these bad boys you will need:

2 large tortilla wraps

  • 4 eggs (see note below)
  • Red Chili powder (to your tasting: I find a 1/4 of a tsp is enough as I also add chili sauce)
  • 2 TBSP milk
  • Salt
  • Pepper
  • (whisk the eggs with the milk, salt and pepper)
  • 1 TBSP oil (or a small knob of butter)
  • 6 TBSP cooked black beans
  • TBSP salsa (I use a chunky one)
  • Optional: chili sauce
  • Coriander leaves

1) Whisk the eggs, milk, salt and pepper together.
2) Heat a medium pan and add the butter (or oil) on a medium heat. Now add the egg mixture and stir well. It will start to form clumps of egg. That’s what you want. Cooking the eggs should take around 4-5 minutes.
3) Lightly warm the wrap.
4) Place on a large chopping board or plate and add half the mixture. Add half the beans. Push the mixture towards the centre (I would watch a Burrito rolling video to understand the technique).
5) Add the beans and salsa. Add the coriander (if using) Sprinkle on the cheese. Add chili sauce if required.
6) Now roll that bad boy up!
7) Serve!

To freeze:
Roll up the Burritos and wrap in Cling film. Then place in a ziploc bag, label and freeze.

To heat up: take out of the freezer. Remove from the bag and remove the cling film . Take a piece of kitchen paper and dampen it. Wrap it with the paper (loosely) and zap in the Microwave for 2.5-3 minutes. Remove the kitchen paper carefully to avoid it sticking to the Burrito. Remove from the Microwave and allow to stand for 2/3 minutes. Check the Burrito is defrosted and heated completely before eating.

Serve with a big dollop of Ketchup or my favourite Chili and Garlic Ketchup (sold at most Asian food stores).

Creating new Family Traditions…Weekend Breakfast

Alliyah Dawud
April 22, 2019

I’ll be the first to admit that during the week my breakfast routine is ‘get in town your neck’. My breakfast is usually high in protein (boiled eggs with zataar for example). I also keep it low carb and low sugar.

The same applies to my children; except they have low sugar cereals, Porridge (made in the microwave) or wholemeal toast.

However we do like the idea of a longer, more lazy breakfast with more variety. So we have developed a bit of a family tradition on Saturdays.

We all get up around the same time as weekdays (an extra 30 minutes to an hour is a good way of catching up on some extra sleep) however we all have a cooked breakfast. It doesn’t have to be the full monty (eggs, bacon, sausages, mushrooms, hash browns, beans etc) but it’s usually cooked.

It doesn’t take me ages to cook breakfast because I do the following:

I use frozen hash browns that I air fry

I use frozen sausages that again I air fry

Fried eggs take no time at all; if the girls want omelettes we stick to omelettes and hash browns and beans.

I don’t make fresh juice; I leave my desire for fresh juice for when I am on holiday

I take items out of the freezer the night before and defrost them in the fridge overnight-then pop them in the air fryer in the morning.

We all like bit of bacon (which we do fry) and that takes a matter of minutes to cook. Any leftovers get added to mac and cheese.

If you do like mushrooms you can actually buy sliced mushrooms frozen.

The girls rarely like smoothies on Saturdays but if they do want one it’s simple to create as I have frozen fruit, frozen yogurt cubes etc at hand.

I have a menu that I have on display in the kitchen for Saturdays. We like to make things special. I keep all the ingredients on hand for all the menu options.

My menu includes:
The full monty
Mini monty
Omelettes
Cloud Eggs
Egg Muffin
Eggy bread
Fluffy pancakes (optional: serve with bacon & syrup)
Egg, cheese and bacon muffin
Spinach, egg and hash brown tortilla wraps (prepared, cooked and frozen. All I do is defrost, warm and go).
Sausage sandwich
Sausage muffin
Smoothies
Smoothie Bowls
Sugary cereals (frosties/cocopops etc).
Nutella Porridge (it’s a treat due to high sugar content).
Parathas and eggs (the best of desi breakfasts!)
Breakfast specials (on Eids etc such as Breakfast quesadillas, breakfast casseroles, sheer khurma).

Drink wise:
OJ
Tea
Green tea
Desi Chai

I make breakfast whilst the girls usually watch a bit of morning TV however they do try to help with certain options.

We then enjoy breakfast together. In Summer we usually have breakfast in the garden and make the most of the season. The girls then play in the garden whilst I clear up and do any washing required.

We all eat which makes this tradition of ours easy to keep up.

If we have to be somewhere early I narrow down the options for the girls the night before and prepare as much as possible in advance. Very rarely have we had to have cereal and run out of the door. I’m a planner; so try to keep on top of things.

And as someone that meal plans my freezer is always stocked with essentials; which makes life so much more easier.

My aim with lazy Saturday breakfasts is to create memories for the girls plus I hope they’ll find the time in their busy lives when they have their own families to sit down and eat together at the end of the week and reflect on things. It’s like date night, but at breakfast and all the family are invited. It also helps set the tone of our weekends (Which I try to focus on family friendly activities which both girls can take part in). I believe it’s important to lead by example and putting in an effort so we all sit together and eat together is setting an example of the importance of family and appreciation (gratitude) of what we do have.

I would love to keep this tradition going when the girls are teenagers; but who knows what the future will bring.

In the meantime though I’ll carrying on waiting for the girls to decide on what they want to eat (only to pick what they had the past 9 Saturdays on the row).

My awesome Tacos

Green Lentil Tacos!

For those that know me will know I love green lentils. They are bloody awesome.

Here is my version of a ‘vegetarian taco meat’ which I believe is the bloody best!

It’s an awesome ‘Meat Free Monday’ recipe. It’s also great for a big crowd as everyone can build their own tacos to their own tastes. If you do serve this for a big group add some tortilla chips as a side.

Its cooked in the Slow Cooker however it’s started off on the stove. It’s awesome because you can freeze it. It’s also awesome because about 15 minutes work results in Tacos that are soooooo good you will be singing me praises.

For this recipe (which makes enough for 8 large tacos) you will need:

(Ingredients):

  • 2 medium onions-sliced
  • 8 cloves of garlic-crushed
  • 2 TBSP rapeseed oil
  • 1 TBSP oregano
  • 1 TBSP cumin
  • 1 TBSP coriander powder
  • 1 TSP smoked paprika
  • 1 TBSP salt (adjust to your own needs)
  • 1 TBSP onion powder
  • 250 grams green lentils (my go to super food).
  • 800 ml of water (or stock)

1) Wash and soak the lentils in boiling water for at least an hour. I cover the bowl with cling film and this works great. You can also place the lentils in a thermos.
2) Heat the oil in a large pan and fry the onions until soft. You don’t need them to be browned. Add the garlic and stir and fry for 30 seconds.
3) Drain and add the lentils and fry. Add a bit of stock (or water) if the lentils start to stick.
4) Add the herbs and spices. Mix well.
5) Bring to the boil. Transfer to the Slow Cooker and cook on high for 4 hours. Check after 1.5 hours. Stir well. Check again at 2.5 hours. If you notice that the liquid (Stock) has evaporated add more water as you need the lentils to cook.
6) Once the lentils are tender turn off the Slow Cooker. If there’s stock left transfer to a pan on the stove and heat the mixture on a high heat without a lid.
7) Remove from the heat and mash the lentils lightly.
8) BOOM! Lentils are done.

To assemble: You will need:

  • Tortilla wraps (I used the mini ones I get in Aldi)
  • Salsa
  • Cheese
  • Sour cream
  • Jalepenos
  • Shredded Lettuce
  • Chopped tomatoes
  • Sliced red onion
  • Wedges of lime

To put together this awesome delight of a taco:
1) Warm your wrap.
2) Spread on the lentil mix.
3) Add the lettuce, tomatoes, onions, salsa and a dollop of sour cream. Squeeze on the lime.
4) Sprinkle on some cheese and add some jalapeno’s.
5) Stuff face. Enjoy. Repeat.

Notes:

  • This recipe is also used in my Crunch wraps.
  • You can freeze the lentil mixture.
  • It’s also great for stuffing Burritos and filling Enciladas.