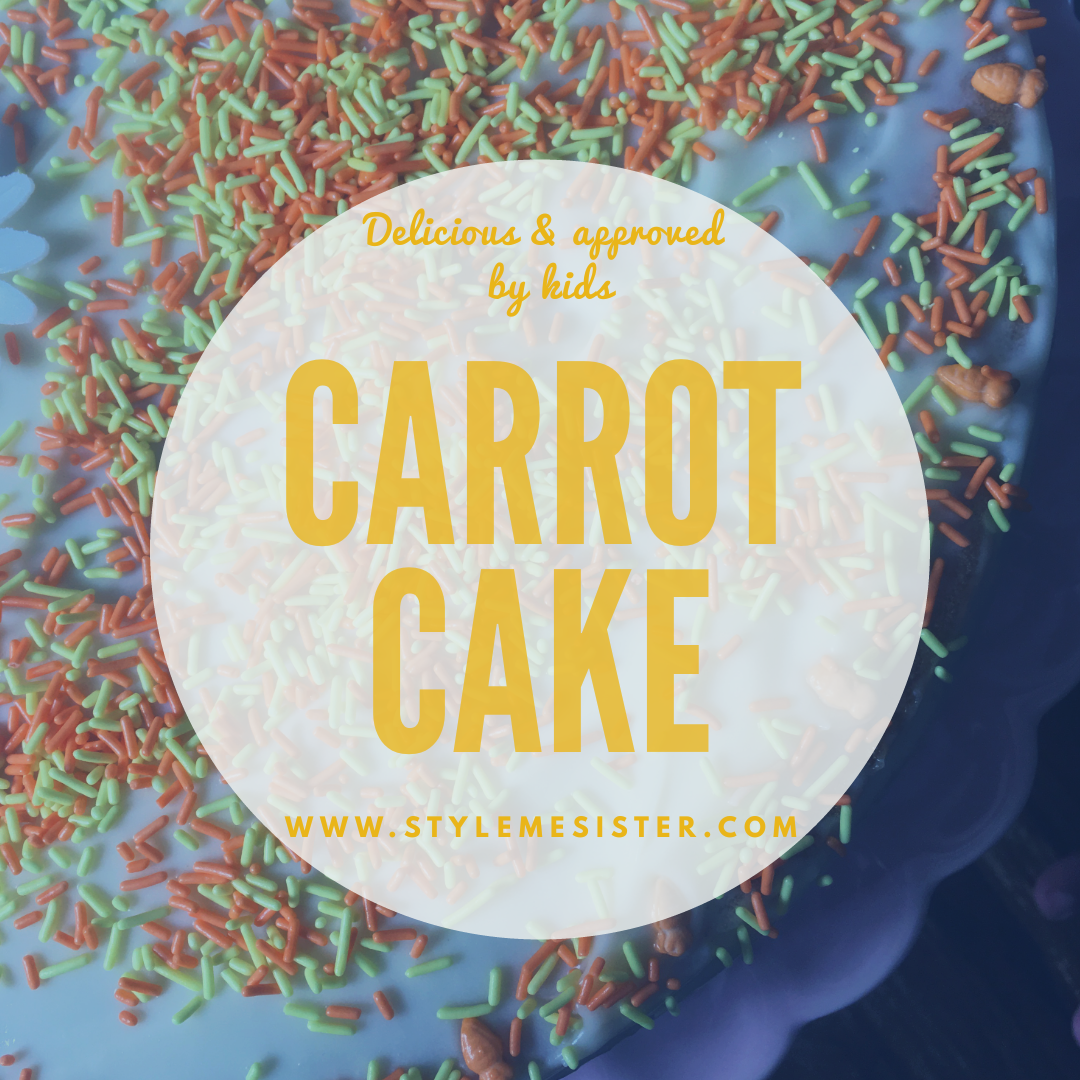
Child improved Carrot Cake…

Stylemesisteradmin
November 16, 2018

Carrot Cake

I have a soft spot for delectable carrot cake. When I was younger I used to heave at the idea of a vegetable in a cake. Actually I just disliked all vegetables as my parents lacked the kitchen skills of cooking vegetables without blitzing them into a ghastly grey mush.

So when I was older I discovered my love of cinnamon, orange and carrots combined in a carrot cake. The sweet yet spiciness from the cinnamon and the slight zesty taste from the orange married to carrots in a sponge had be at hello.

Over the years I’ve tried various recipes and I have to admit the best one I have found it the one I have below. I actually make the cake without raisins or nuts as my youngest loves carrot cake (she loves cinnamon) but cannot stand nuts or raisins. So rest assured that if you need to omit these ingredients this cake still tastes bloody awesome!

This cake also freezes well so I cut it into slices, wrap it into greaseproof paper and freeze it with the intention of using it up within 3 months. Don’t forget that leftover cake can also be used as a trifle base. So really there’s no reason for wastage here.

This cake is pretty easy to put together however I’ll warn you now; peeling and grating took me about 20 minutes. So if you have children who like carrot cake encourage them to help.

Ingredients:

Dry ingredients:
260 grams plain flour
2 tsp baking powder
1 tbsp ground cinnamon (less if you are not a friend of cinnamon)
1 tsp salt

Wet ingredients:
300 grams castor sugar
300 ml vegetable oil
4 medium eggs
Juice of one orange (& fine zest if you like citrus)

Fruit, nuts & Vegetables:
4 large carrots peeled and grated (or 6 medium carrots)
60 grams chopped up walnuts & a few ‘whole’ pieces to decorate the cake
60 grams raisins

Icing:
100 grams cream cheese
250 grams icing sugar
100 ml double cream
1 TBSP orange juice

1) Heat your oven to 170 c. Grease a 20 CM (8 inch) size round cake tin. I usually use Wiltons cake release as it it’s basically like greasing and flouring all in one but with no mess. You squirt a bit on the pan and brush it around. That’s optional; you can also use greaseproof paper to line your tin.

Note: you can use this recipe to make cupcakes. Fill large muffin tins up to 2/3 and bake for 20/25 minutes.

2) In a large bowl mix together the dry ingredients. Set to one side.

3) In another large bowl (the bigger the better trust me on this!) mix together the oil and sugar. Add the eggs, a bit at a time (you can add one at a time to make it easier for you). Beat together. You’ll notice the mixture is becoming like a thick paste. Don’t worry; that’s science. Once you’ve added all the eggs stir in the orange juice and zest (if using).

4) Now carefully add the dry mixture to the wet mixture folding in to ensure the ingredients mix well to create a batter. This may have a little while but don’t panic.

5) Now you need to add in the fruit, nuts and carrots bit my bit. Fold in.
Note: please don’t reduce the amount of carrots thinking you don’t need that many. What’s a carrot cake without carrots?!

6) Now that you’ve managed to make the cake batter (well done you…you domesticated force of baking power). Pour the mixture into the prepared cake pan. Bake in the oven for 40/45 minutes until golden brown and a skewer comes out clean.

7) Allow the cake to cool and then remove from the tin.

8) to make the icing: whip the double cream until stiff. In a separate bowl whip together the cream cheese and icing sugar. Add the orange juice. Stir in. Fold in the double cream. Refrigerate until you ice the cake.

9) Ice the cake. I just added a layer all over and used cake decorations to add a bit of jazz.

10) Serve with a cuppa.

5 Top family night ideas

Alliyah Dawud
October 25, 2017

5 top ways to spend time together as a family

Admit it. Sometimes the idea of organising a ‘family night’ can bring on more stress that a two mile traffic jam when you have five minutes to get your appointment.

I’m all for quality over quantity. I do cherish the idea of eating together but it’s not always possible (cue-the endless after School clubs, Quran classes, homework, housework, prep for work etc etc). So instead of telling you the only way to be a strong family is to eat together everyday I thought I would share my top 5 family night ideas.
If you have your own ideas do leave them in the comments section.

1) The classic-Movie Night

With the rise of on demand services Movie Nights just don’t have the same allure; unless you put some oomph into it. If you organise a Movie Night for the weekend you can encorporate the following activities into it:

Decorate your own pizzas
Pop some corn (or make other snacks)
Make your own cinema tickets or posters

If you are doing this on a weekend I would leave out the majority of creative activities (the only one I recommend is the pizza decorating as the majority of this prep work can be done in advance or even shop bought).

Make it extra special: pick a theme. And if everyone cannot agree on the movies to be watched then plan additional nights to accommodate everyone. This is FAMILY time after all.

Turn off phones & other technology that will distract attention.

Dim the lights, get out the cosy blankets, open the packets of snack and enjoy.

NOTE: I’m not recommending this every night of the week so snacks like chocolate are more than welcome as a treat (you’d buy a pack at the cinema wouldn’t you?).

1) Board Games Night

I love Monopoly. I’m competitive and love a good session of Buckaroo, Pop up Pirate, Connect 4, Ludo and beyond. I am an 80s baby and we know the true meaning of board games!

It’s hard to picture children cherishing board games the way my generation did. However that shouldn’t put you off. Dust off the board games in the attic and create a bit of friendly competitive spirit amongst the family.
Of course if you don’t own any board games and you want to try this you have options:
Ask friends and family if you can borrow their games
Check out carboots/flea markets/eBay/Gumtree for a bargain or three
Purchase new versions of the classics (more money so make sure your family are actually going to participate).

Get some snacks (food you can eat with your fingers and not need to sit down as a table work best) and some fizzy beverages (or still if that’s more suitable) and turn off your phones. Reconnect with your own childhood and share the magic of pre-technology life.

My top recommended games for children under 9:
Operation
Pop up pirate
Connect 4
Mouse Trap
Buckaroo

Older children may enjoy:
Cluedo
Monopoly
Game of Life
Charades

NOTE: cheaper versions of famous classics can be purchased for nearly half the price of new games in UK stores such as Home Bargains.

Digital Games Night

Now it’s 2017; avoiding technology as a family is impossible. If you have access to a games console the why not organise a family games tournament?

You’ll need some games (ideally ones that get you up and moving about. My personal favourites are the Just Dance games). Draw up a table and get playing.

For this to work you’ll need to ensure you have enough space to move around (so you don’t end up smacking little ones in the face with remotes-it’s painful trust me).

You’ll need your drinks and snacks as before.

If you you a console but not many games eBay have some great second hands going for less than a fiver. Check out Amazons market place too. And don’t forget your own local charity shops.

Family Cooking Night (ideal for Weekends)

No I have not lost the plot. Just hear me out. If you want your children to get into the habit of eating fresh food, be able to cook and prepare it and clean up after themselves who do you expect to actually teach your offspring these KEY SKILLS?
Exactly. No one else will do it for you so if your children are old enough get them into the kitchen to help.

Here are some of the task younger children can help with:

Planning the meal
Cutting up spring onions/bacon/lettuce using safety scissors
Whisking (cream/eggs etc)
Setting tables
Making salads & dressings (screw top lidded bottle or jar would be useful).
Wiping down surfaces
Clearing away tables

If you are keen to encourage cooking habits maybe you can invite family over to join you (how about treating Gran?).

Pick a menu that is easy to prepare and cook. Save five star mitchelin meals for when you are trying to impress the in-laws. Don’t expect perfection from day one. This is about the time you spend together just as much as developing your children’s skills. Enjoy the time together. Children grow so fast (kinda like mint….).

Indoor Camping Adventure (ideal for weekends)

So if you have adventurous souls in your family but they don’t like the idea of creepy crawlies in their sleeping bag this idea is for you.
Create an indoor camping adventure.
You’ll need duvets, blankets, sleeping bags, torches, and a CD/Mp3 player/Tablet. If you have fairy lights dig them out and decorate the room with them too. Younger children may wish to bring a ‘guest’ in the form of a teddy bear.

Food wise here are my suggestions:
Hotdogs
Sausage and beans
Jacket potatoes/potato wedges
Chili con carne
Smores
-anything that is connected with the outdoor camping experience

Activities:
This one is all about imagination. So you’ll making up stories, or telling stories you already know. There’s also shadow puppet making, urban legend stories you can look into and even building a tent from bedsheets.
If the night is clear you could even go star spotting.

Why do we need a CD/Mp3 player/tablet?
To create an atmosphere. You can save/download woodland sounds which you can play in the background of your adventure.

So that’s my top 5. There are plenty of ideas out there (check out Pinterest for more inspiration). The most important thing to remember is you are spending time together as a family. It’s about quality of the time spent. It’s about creating memories. You are not in competition with anyone else to give your family the best of you.

So what is your families favourite way of spending the evening TOGETHER?


How to create a Master To Do List

Alliyah Dawud
October 24, 2017

How to create and manage a Master To Do List

That endless to do list. It gets under your skin. You feel like you are constantly trying to fight the need to do things and little gets done. Urgh. And every week just as you think you can cut something off the list you need to add another nine. Oh dear. Life is like this. It’s a mountain of tasks that never seem to get completed.

We see all this posts of organised women showing us beautifully crafted completed lists (on equally pretty notepaper). We cry into our soggy cereal with our so-called waterproof mascara running down our full foundation faces.

So really apart from selling your kidney and paying a temporary PA to come and work for you is there any real way of combating the To Do List dilemma of the 21st century lifestyle?

You betch’ya!

Really? And you don’t have to research the dark market and sell your organs either! Yay!

Welcome to the world of Master Lists. A Master List is simply but a list of tasks you need to complete. They could be tasks such as ordering wallpaper, getting someone to fix the driveway gate, order Birthday cards….everything you need to do. You put these all on a list that is designed to be a running list. In other words you won’t ever complete the list in your lifetime. Scary thought but it’s being realistic. We all have responsiblities and our tasks are always being added to. So this list is basically the list that will help you create weekly more manageable lists you will be completing.
So this list holds all the tasks you need to do, with an ideal projected date that you want the task completed by.

My list also has additional notes on it. E.g. I usually buy presents throughout the year so I record the location of items in the book. You could also colour code things to make things more organised. This is about making your life easier so modify it to reflect this.

So what do you need?

The ideal list is below:

2X notebooks/jotters/list making notepads (I use an A5 notebook to create my Master list and a smaller one for my weekly list)
NOTE: If you are self employed and wish to create a list for work too double the supplies.

Additional notepad to make notes etc/Sticky notes

Writing supplies

Your diary, calendar, or other time planning methods you use to plan your time.

PATIENCE

At least half an hour to get going (this is an on going project)

Getting started:

1)So you are serious about tackling this. Hurrah! First thing is first. Write down everything you need to do. Like literally. If you are creating a master list for work and home life you’ll need to write them down on the appropriate notebook/paper.

2) Now go through the lists. Is there anything on the lists that doesn’t belong there? Anything that needs doing immedately e.g. booking Hospital appointments or buying Grandmas birthday card and flowers for next week need to be put on an immediate list (you won’t be needing this once you get into the Master to do list system but to get you going you’ll need it). Is there something on your list that is on there because someone else is shying away from their responsiblity? Now is the time to delegate that task. Reducing the tasks will help you on the next step.

3) Now draw two lines down the page of your notebook that will be your Master List. Leave a large column to write the task. You need an additional column to record the date of when you wish to complete the task by and the final column is for ticking off the task.

4) Transfer your tasks to the Master to do list. That’s everything! EVERY.little.thing.

5) Now look at your schedule for next week. How’s it looking? How much time do you realistically have? Got a number? Great. Now comes the big part….

6) Look at your Master to do list. Look for tasks that can be completed in the time you have available and write these tasks on your WEEKLY to do list.
By understanding how much time you have and not over stretching yourself you are reducing the chances of failure and increasing the chances of things getting down.

7) By the end of the week you should have completed your weekly to do list. Tick off anything you’ve completed. Anything that hasn’t been completed can either be re-added to the Master to do list or to the follow weeks list.

8) At the beginning of the week (or on the day you do your weekly planning) create next weeks list.
NOTE: you’ll also be adding things to your Master list. RELAX. This is the idea. The Master List is continiously updated. The idea isn’t to complete everything it’s to be in control and understand what needs doing.
Your weekly list (that you’ve created from your Master List) is the list that will be completed on a weekly basis. This list helps you chart your progress too and gives you a sense of goal completion.

9) Repeat the above steps until it becomes habit or you find another system that suits you better.

Additional notes:

This system can work equally well for couples and families. If you are creating a master list for families you can create weekly lists for family members too.

If you’ve been living in an ocean of incompleted to do lists for as long as you can remember don’t panic if it takes a while to do used to this system. Keep it up for a month and evaluate if it works for you.

Any comments or question; let me know.


OMG OREO BROWNIES

Alliyah Dawud
October 12, 2017

Easiest Oreo Brownies like ever

Hands up who likes a good brownie. I see some of you are in denial. Well I ain’t going to lie to any of you. I love brownies. Maybe because they are easier to put together than a cake that needs decorating. Or maybe because I can adjust the flavouring ingredients to reflect what I have in my leftover chocolate jar (yup there is such a thing).

I love one bowl recipes because of the lack of post clean up required. If you have baking these for a bake sale you can even use foil disposable trays/containers so you don’t need to worry about losing your favourite platter plate post event.

I’ve used the original flavour of oreos for this recipe. Let me know if you try other varieties and how they work out.

Ingredients:

9 whole oreos (to make the stuffed oreo brownies)
3 oreos chopped up (optional to decorate your brownies)
150 Grams butter/other solid fat suitable for baking (I personally use Stork or store brand) Softened/melted. You can use the microwave to blast it.
225 Grams Castor Sugar
65 Grams Cocoa powder
Pinch of salt
1 tsp vanilla flavouring or extract
2 eggs (large)
60 Grams plain flour

1) Preheat your oven to 325 F (160C). Line a 19 by 19 cm square pan (the easiest way to line one I found was to basically take a roll of foil and place it in the pan and leave excess foil on both ends so there’s overhang. Then repeat the process to cover the other two ends. Again leave excess to create overhang. It will look a bit like a cross. Yes there won’t be foil lining right up in the corners however that’s fine. You won’t be removing the brownie until it’s cooled so it’s fine. Don’t worry!

2) In a large bowl beat together the margarine, sugar, pinch or salt and cocoa powder. As you beat it (anyone else hear MJJ song right now?!) you’ll notice it looks grainy and well not very brownie like. Don’t worry. It’s normal.

3) Add the eggs and beat further.

4) Now add the flour and vanilla. Beat to encorporate the ingredients in.

5) Now take half the mixture and pour it into the pre-prepared pan. Now add the oreos. Cover with the remaining brownie mixture and smooth over with a bread knife/palette knife or other suitable kitchen utensil.

OPTIONAL: You can scatter the crushed/chopped oreos on top if you are using them.

6) Place the brownie on the middle rack of your oven. Bake for 30 minutes (please note: I like my brownies sticky but not gooey. So 30 minutes does that. If you prefer gooey ones take the brownies out earlier around 25 minutes).

7) Once the brownie is baked take it out of the oven and allow to cool completely before removing from the pan.

If you’ve lined the pan as I do (using two pieces of foil) you’ll need to gently lift out the brownie using the handles.

8) Remove from the pan and slice into 9 pieces.

Voila. Job done.

If the calorie count isn’t enough for you you could warm the brownies and serve with a scoop of vanilla ice cream and drizzle with chocolate sauce.

Enjoy!

NOTES:

You can easily double this recipe.

These brownies freeze well for for 8 weeks. Wrap individually in greaseproof paper, and then wrap in foil and place in a zip lock style bag or airtight food box.

5 ways to spend time and nurture relationships with your children

Stylemesisteradmin
March 17, 2016

12788556_10153808478970041_105318988_o

We’re living in a society that is technology obsessed. Quality time gets interrupted by Facetime. Family meals are often dominated by the tone of messages coming through. And when you watch a film your checking your emails. It’s a safe bet that a lot of families want to spend more time with their family and less time fretting over technology. So here are my 5 suggestions to try this week.

1) Get creative. Let your IMAGINATION run free. And I’m not talking drawing or painting. I’m talking use your imagination be a big kid and PLAY as a family.

Use your bed sheets and duvets and build dens and ‘tents’ in your living room and pretend you are camping. Sit in a circle and tell stories. Make shadow puppets when it gets dark. Make hot chocolate and make some stovetop smores. Involve the children in the cooking/preparing if possible. Sometimes all it takes is one idea to spark a lot of ideas. Keep a notepad around to jot down ideas for future play days.

2) Go SPLASH in puddles and take photos; CREATE memories. No really. We put so many rules and regulations on children we forget they need to be children too. They need to explore. So next time the forecast says rain don’t turn the TV on straight away. Get your rain macs out and dust off your wellies and go have FUN. Take plenty of photos. Trust me some of the photos you will end up with make you smile everytime you look at them. In the day of Social Media photos can become somewhat forced. Let children have fun and capture that moment. That’s what makes a picture some to life.

3) Have a board game tournament. Got board games gathering dust? Dust them off and get (a bit) competitive. Prepare some snacks (these can be as simple as vegetable sticks with hummous or push the boat out and make some posh popcorn).

4) Look at family films and photos together. Learn about your family tree. Why not ask your parents if they wish to help teach your children about your family history? Children often love looking at old home movies.

5) TURN off wi-fi and TALK. That’s it just talk. Talk about School. Where the children want to go on holiday. What your child wants to be when they grow up. Sometimes we forget to listen to our children. We should all be in the habit of talking to our little ones so we nurture an open communication method. This is vital as our children grow. Open communication from the start will encourage your child to talk to you openly and honestly. And when they hit their teenage years you will be thankful for such a relationship.

It’s fascinating listening to children talk about how they see the world. If you have access to a camcorder (and most phones have great cameras on them) film your child talking. If you do it every year you’ll be able to document their growth in an interesting way.