My top 10 versatile decorations…that will last!

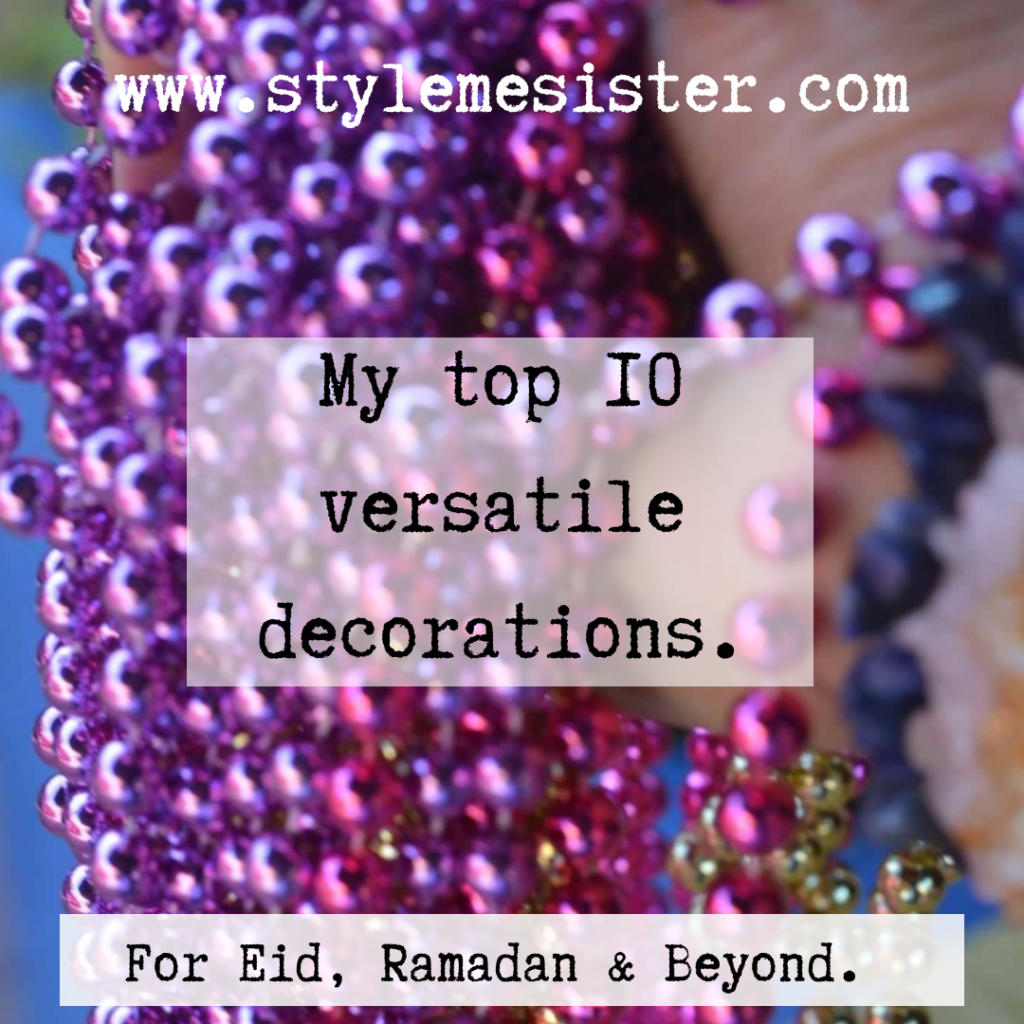
Versatile decorations for Eid, Ramadan and beyond.

Don’t you just love it when Christmas decorations land in shops in July. No really. I’m being sincere. But why would a Muslim be excited about the decorations that spill out of every single shop on the High Street?

Because we’re living in an era where most decorations can be used across religions, cultures and beyond.

How is that possible I hear you cry. Well firstly the decorations market is becoming more and more competetive as social media sites such as Instagram show us how ‘the other half lives’ and well we all want to buy decorations that truly are awesome, unique and non standard in the traditional sense.

When I was a kid I remember tinsel, tinsel, more tinsel and red and white decorations. Gold was also a feature colour. But that was the colour palettes the general consumer worked with unless they became creative and produced their own decorations (in an era before Pinterest trust me this was very very difficult).

I love decorating my home for Eid, Ramadan and Birthdays. I just love bringing in magical vibes for the girls to get lost in. So I’ve created a list of my top 10 decorations that are fit for a variety of celebrations.

Make a list of what you need and when the decoration season hits fill that basket with a bargain or three of versatility.

NOTE: shops have already started slashing prices guys! So see you all on Boxing Day to get our decoration fix.

1) Beaded garlands.

Without a shadow of a doubt this is my top decoration. You can pick up beaded garland in an array of colours. We currently own a bucket of gold beaded garlands plus pink and purple. We also have some white ones (for Frozen themed parties).
Now I use them: hang them up, wrap them around things, use them to hang up lanterns…get creative.
Why I love them: they are so versatile. Plus they are cheap and durable. Poundland bring in a range of colours every year. That’s a quid for 8 metres. And if you are looking at topping up your collection you can pick up garlands for as cheap as 25 pence in the post Christmas sales. That’s right. How do you think I ended up with a bucket of gold beaded garlands?

2) Paper lanterns
Oh my goodness. This is where my Pinterest obsession creeps in. Years ago I came across an image of a Tangled themed wedding and they used various paper lanterns to decorate the gazebo. It looked magical. The next thing you know I was ordering various lanterns in various colours and sizes.
So as these lanterns are made from paper you cannot use them with candles (just thought I would point out the obvious) and due to the material they can be delicate to handle so you need to bare that in mind. However since I first started using lanterns 4 years ago I haven’t damaged a single one beyond a bit of TLC.
Now to use them: assemble them (straight forward procedure so don’t panic) and hang them up. If you want to create a magical airy look use transparent thread.
Why I love them: the instant pop of colour! If you need to decorate a large area you can get some pretty big lanterns and hang them in clusters (in a mixture of sizes) to create a bit of a feature. The combinations are endless if you mix them up with honeycomb balls and paper fans. Plus if you look after them you can REUSE them!
My top tip: want a bit of extra bling for an outdoor event? Spray the lanterns with glitter spray. The glitter will glisten in the sunlight.
I usually order mine 6/8 weeks before I need them so I can order them cheaper from China.

3) Honeycomb balls
When my oldest turned one I ordered pink honeycomb balls and at the time places like Poundland didn’t stock them so I paid a silly price per ball. Anyhow 7 years in and those honeycomb balls are still being used. The honeycomb balls get their name from their pretty shape.
You can buy honeycomb balls (made out of tissue paper) in a wide range of colours and sizes so there’s something to fit every budget.
Why I love them: the range of colours and sizes available readily makes these babies a must for me. Plus if you fold them back up and store them carefully they WILL last (like I said I’ve had some for 7 years…).
Tip: if you require larger sized honeycomb balls and want to grab some at a bargain try eBayers in China.

4) Glitter covered branches.

So if you cannot take glitter avoid these guys. But if like my family you need a bit of bling these are worth their weight in gold.
Basically dried branches are painted and covered in glitter. You then take these beauties home and place them in a vase and great a centre point for your table, mantle etc. I bought a range of colours in the post Christmas sales. I drape beaded garlands on the branches to add some extra bling. You can mix and match to make a statement.
Why I love them: its a big statement piece at an affordable price. I paid £1.25 for a bunch of branches from Asda post Christmas. They can be reused too.
Tips: planning a mendhi? Why not get green branches and drape over gold beaded garlands as the centre piece for tables.

5) pre cut foil letter banners
I love a good DIY project but I find some things are cheaper to purchase readymade and in the case of Foil/glitter card signs. If you calculate the price of card, plus the time it takes to cut the letters out etc buying pre-made is a bargain.
I use Eid Mubarak glitter letter signs to create statements at Eid. I got 3 signs from eBay for £4.68 (the seller was based in China and I placed my order 2 months in advance).
Why I love them: simple statement really. Affordable and reusable. Plus I like to have signs in photos incase I suffer from memory problems when I’m older.

6) Fairy lights
Oh dear lord. Fairy lights! I don’t think these need much of an introduction but with such a variety there’s so much scope with them. Drape them around the home, hang them up, use outdoor ones draped over plants…the possibilities are endless. There’s colourful lights, twinkling ones, solar powered outdoor lights, flashing ones…ones you can connect up to speakers. What a time to be alive if you love fairy lights.
Why I love them: just re-read the above.
Tips: Superstores often have offers on around Christmas and you can actually pick up bargains before the post Christmas sales.

7) Paper mache pre-made letters
If you have lots of shelves or a mantle that needs a bit of festive love this could be a cost effective option for you.
I bought my letters off eBay and paid £1.20 per letter (with an additional 15% off for buying 10+ letters). I then painted the letters using metallic paint (purchased from Poundland-I can recommend their metallic acrylic ‘poster paints’ as I’ve used purple, gold and turquoise from the range). The project took a total of less than 2 hours and I now have a set of awesome freestanding letters than look awesome on my shelves.
Why I love them: you can spell whatever you want to. And you can use any colour, use a bit of glitter…and let your imagination run free.
Tip: a great crafting idea for little ones to get them in the festive mood and let them participate in the decoration of the home for any special event/festivity.

8)Painted upcycled jars (as candle holders)
I love a good DIY project so this was right up my street. I collected a range of glass jars and painted them in a range of jewel coloured glass paints.
I use these holders with battery powered ‘tealight’ candles so I don’t have any major fire hazards to worry about whilst celebrating. Plus I don’t have to scrape wax out of the holders (less work!).
Why I love them: I can use the jars outdoors and indoors and the glistening lights look magical. Plus the colour range of paints is amazing.
Tips: keep the jars in your shed/outhouse during colder months as frost will damage them. Get children involved in painting jars. If you have a steady hand try using glass outline pens to draw on patterns. The possibilities are endless.

9) Baubles
The old fashioned bauble has withstood the test of time. You can pick up baubles in all colours, textures, shapes and sizes too. You can hang them up, place them in vases, stick them to a hula hoop and create a large wreath….get creative with these babies. You can also create personalised bauble countdown garlands by writing on the baubles too (e.g. 6 sleeps til Eid…. etc). Hang some baubles with ribbon and hang them in your window.
Why I love them: baubles are a cheap and effective away to add colour and texture to your home and decor collection. You can get creative with them too. Pick up boxes of baubles from Superstores and DIY stores such as B&Q in the post Christmas sales.

10) Wire decorations
Again I love DIY and garden wire based decorations are one of my favourite things ever. Firstly you can get really creative and let children join in. Secondly wire is really affordable (especially if you use garden wire) and thirdly you can create decorations for the garden that will last a while.
My favourite things to create are cressant moons and also letters too. I wrap them with hessian string (again super affordable) and then paint them (our favourite: gold paint). Intertwine with fairy lights and create something magical.

That concludes my list of decorations I recommend for your decoration box. I delibrately left off balloons as yes they are super cheap but cannot be reused.

What is your favourite decoration? And what would you rather be without? Leave a comment below.

Busy Mama (or Baba) Slow Cooker Chicken

Stylemesisteradmin
December 21, 2018

Busy Mama (or Baba) Slow Cooker Chicken

I admit that this is more of an instructional tutorial than recipe however if I’m completely honest with you on nights where you are more likely to reach for a fattening takeout or ready meal cheats like this are awesome.

By no means am I saying feed your family this every night however let’s be honest here. Sometimes we need a meal we can prepare whilst juggling a clingy baby, a toddler crying over toys that have somehow ended up down the toilet and a boss that wants to know when you think you’ll be returning to work FULL time.

My children love this recipe (as do I). The only effort in this recipe is the actual browning of the chicken.

Once I’ve browned the chicken it’s pretty much throw stuff into the slow cooker and forget about it until you need to prepare the rice to serve with it (I served the chicken with basmati rice).

Did I mention this meal works out at less than £0.75 per head?

So to put together this super easy meal (that serves 4/6) you will need:

6 pieces of chicken (I purchased three legs, skin on cut in half)
1 tablespoon oil

For the sauce:
60 ml dark soya sauce
3 tablespoons honey
80 ml tomato ketchup (for an extra kick you can use flavoured ketchups)
8 cloves of garlic-crushed
Juice of 2 limes
Optional: salt to your taste (remember that soya sauce is very very salty!)
Optional: 1 teaspoon chili flakes (for some heat!) OR 1 tablespoon chili sauce

To serve:
I served mine with rice. If you are on a low carb diet replace with cauliflower rice.

1) Heat the oil on a medium heat in a large pan. I use a non stick large frying pan.
2) Add the chicken pieces and fry for 5 minutes per side (I find this browns and crisps the chicken nicely. Always check your chicken whilst cooking it to avoid burning it).
3) Once the chicken is browned drain on some kitchen paper and set aside.
4) Now make the sauce. Pour the dark soya sauce, honey, ketchup, garlic, lime juice and optional ingredients (if using) into your slow cooker and stir to mix. You could use a whisk if that’s more convienent.
5) Add the chicken to the sauce. Spoon some of the sauce over the chicken. Cook on slow for 5 hours. If you are cooking on the high setting check your chicken after 2.5 hours. Remember that chicken on the bone cooks slower than boneless.
6) Check your chicken at half way and baste it with the sauce (your chicken is highly unlikely to dry out but we want maximum flavour).
7) Your chicken is ready to serve.

Notes: if you do wish to add salt please do so towards the end of the cooking process after tasting salt content. I find it easier to add salt that take it out if you over salt a dish.
Leftovers make great lunches the next day.
Or you can shred the chicken and make sliders (sandwiches).

Salted Caramel Popcorn

Stylemesisteradmin
December 14, 2018


Salted Caramel Popcorn

I cannot be the only one that looks for ways to add the magic of Ramadan and Eid to the lives of those around us. I also cannot be the only Mama who looks for ways for her children to share this blessed and magical time with their friends and Teachers either.

As my girls get older they are noticing more and more that a lot of attention is given on a global scale to Christmas. They also notice that gift giving/baked goods and other little items are distributed a lot during the festive period.

So this year I put a bit of effort into my children’s light Dawah on the playground. That’s right; I classed this project as Dawah. Because even though there isn’t any spoken words to this we are paving the way for conversation. And we are also spreading kindness. Dawah in my book doesn’t have to be about preaching. It’s also about creating opportunities to discuss things.

So why am I posting this recipe so close to Christmas? Well I don’t see any reason why you cannot distribute these cones for Christmas too.

So to make 12 cones of pure yumminess (that took me about an hour and a half to actually do) you will need:

Ingredients:

500 grams popping corn (plan stuff available in most supermarkets and is actually quite cheap)
4 TBSP oil (sunflower works-no need to go fancy)

For the caramel:

600 grams sugar (I used a mixture of what I had in the house-which was soft light and dark brown sugars)
550 grams of butter (feel free to use salted)
Sea salt (crushed) to taste.
4 TBSP honey
4 TBSP double cream

To wrap up:
12 x cellophane cone bags (I purchased these in a set of 50 as I have other projects coming up)
12 x wire twists to fasten the cones
Stickers (optional-we bought Eid Mubarak stickers off eBay. I’ll be using personalised ones for the Christmas cones we are distributing too).

Equipment:
2 large baking sheets (or 3 smaller ones). Line with greaseproof paper. I prefer to use the sheets that are used to make tray bakes etc as they have high sides which prevents popcorn falling off.

1) You need to start by popping the corn. I popped the corn in batches. I placed 2 TBSP of oil in a large pan and heated in a large pan and add 150 grams of corn. Give it a quick shake and place the lid on. Now is the fun part. You need to listen to the corn pop. This takes around 5/6 minutes. Give the pan a shake (carefully as it will be hot!) during the 5/6 minutes to stop the popcorn burning. Once the speed of the corn literally dies down (again around 5/6 minutes in). Turn the heat off. Give the pan a shake. Do not remove the lid just yet in case you get hit by a stray popped corn.

2) Repeat step 1 until all the popcorn is popped. Remove any cernals that haven’t popped (chipped teeth are not in vogue). Place the popcorn to one side. Now make the caramel.

3) As there’s a lot of popcorn I make the caramel in TWO batches. I find this the best way to control the situation.

Heat half the butter and half the sugar in a medium pan. Stir the mixture to prevent it burning.

Cook over a medium heat until the caramel is formed. Now by this I mean you’ll literally see a sticky, brown liquid lava in the pan. Now add 2 TBSP of honey and stir in. Reduce the heat to prevent burning. Now add the double cream and stir until combined. Allow to bubble for a minute. Turn the heat off. Allow to cool for a few minutes. It will still be hot and you need to be careful not to scald yourself as hot sugar is dangerous.

4) Now comes the messy yet slightly dangerous part. You need to add half the popcorn to the caramel. Stir well to cover as much of the popcorn as possible. Now divide up the mixture onto the trays and spread evenly. Sprinkle on salt to your taste.

5) Bake in an oven at 170 for 15 minutes. Turn the oven off and allow to cool completely. Don’t worry if you peak at the popcorn whilst it’s warm and the mixture looks like it’s melted. Once its stone cold it’s set and will be yum. Hold the vision; trust the process. Always.

Now repeat the above steps to make another batch of caramel/caramel popcorn.

Once the popcorn is cold you may wish to break up the clusters to bag them up. That’s fine. Place in the bags and fasten. Add labels/stickers as you wish.

Any leftover popcorn will keep well for up to 4 days in a ziplock bag/airtight container.

Distribute with pride.

Enjoy.

Note: this popcorn is high in calories and sugar. In case you were wondering.

National Trust annual Family Membership Review

Stylemesisteradmin
November 19, 2018


National Trust membership

This summer I had an increase of energy and love of the great outdoors. Not just because of the awesome weather we had in the United Kingdom (a proper summer!) but also because I have been building up my health and fitness which means I no longer dread a day of being outdoors walking around. I didn’t feel drained just at the mention of being outdoors which believe me I haven’t felt for years.

And now that I feel more comfortable as a Mama I feel more confident in general including going out to places that are unchartered territory and being outdoors during summer holidays? Hugely unchartered.

Now for those of you who don’t know The National Trust is a conservation organisation (Charity) in England, Wales and Northern Ireland; and boasts the largest membership of an organisation in the UK. That’s bloody huge! It started out in 1895 and in 2017 the membership count was 5.1 MILLION. They have around 6,000 staff members and over 60,000 volunteers. That’s huge.

The Trust has a mission which is to preserve and protect historic places and spaces FOR EVER FOR EVERYONE.

This organisation is huge. The numbers say it all. They own over 350 heritage properties which include many historic houses, gardens, industrial monuments and social history site (according to their Annual report dated 2015). The Trust is one of the largest landowners in the United Kingdom.

How the Trust works is most of these venues are open to the public who are charged to access them. The costs are reasonable for what you are accessing however if like me you are looking for places to visit around the year to get your children outdoors then an Annual membership for the family (£120.00 per annum) would be more useful for you.

I did some initial research into what was available near me in regards to venues and I was blown away. A quick search within an hour and 15 minute travel brought up 14 venues! 14. A bit further a field and there’s no much more. I looked at what facilities available at the venues and felt the annual membership cost was justified. If you work on an average of spending £25.00 (approx) on admission into a venue and we visit five during the year we break even. That’s how simple it is.

However I know my girls are growing up and exploring is something they want to do so returning to a venue wouldn’t be something I would out rule. Plus the Trust hold events at their venues throughout the year.

If we visited 12 venues throughout the year (say we visited a few in summer, and then visited in half term etc) that would cost £300.00! We will be paying £120.00 so that’s a huge saving.

So as you can tell it’s worth the membership if you know you want to be outside to enjoy the great outdoors (and indoors).

Since joining in August 2018 we have visited:

Biddulph Grange Gardens (twice!)
Sudbury Hall and Museum
Shugborough Hall

So that’s three venues and four actual trips. We would spend around £100.00 on admissions. And that’s just the start of our adventures as I write this we are planning on visiting Dunham Massey and Little Moreton Hall over the next few weeks.

What can I expect at National Trust venues?

Well maintained, stunningly beautiful buildings and gardens. Sudbury Hall also had events on during the summer holiday and my girls attended a wool doll workshop which was delivered by staff. The girls learnt how to make retro style dolls from wool for £1.50 each (this was an extra cost and not part of the membership due to material costs).

We also attended the Victorian themed Weekend at Biddulph Grange Garden where the girls got to watch a Punch and Judy show and play in a sandpit. The Grange also held an annual event where children can do things that will ‘make their childhood memories’ so to speak such as make mud pies, make things out of twigs and touch a slug and snails.

You can take a picnic or buy from their on site eateries. Places like Shugborough have huge gardens from which the kitchens in the cafe prepare awesome food.
The buildings are kept in pristine condition and volunteers are usually on hand to explain the history which is mesmerizing. There’s also quizzes/trails for children to do around the venues too.

There’s so much to learn about history from the venues and the gardens provide a tranquil place to get back to nature, enjoy the great outdoors and be ‘at one’ with nature. That’s how awesome these gardens are.

A lot of the venues have outdoor play areas too which is a bonus for parents/grandparents too.

We’ve enjoyed our time outdoors and I have taken more pictures of the great outdoors in 4 trips than I think I have in years. That’s how beautiful these venues are.

Do I recommend the Annual Membership?

I did my research and knew the membership was what we needed as a family so I took it out. You cannot cancel your membership (you’ll still need to pay the yearly cost). If you are not sure about taking out a yearly membership you could visit one venue and see how you guys like it. I personally recommend membership.
I can see the venues being perfect for romantic picnics too; so if there are any couples who’ve got children at School and want to enjoy some down time together these venues provide that too.

I give The National Trust 5/5.

Mini Guide to Meal Planning

Stylemesisteradmin
November 12, 2018

Meal planning made easy!

No really; you don’t have to be Martha Stewart of Nigella to carry out successful meal planning.

I bet a lot of you have thought of meal planning and may have even done it and FAILED because of many factors. Some of the main factors that lead to epic maiden voyage failure include:

1) Not considering what your family (and you!) actually enjoy eating
2) Not considering time restraints
3) Not considering budgets
4) Not considering how difficult it maybe to get hold of ‘exotic’ ingredients
5) Not considering fridge and freezer space
6) Not considering family life on the days you are planning meals
7) Not considering the equipment you have at hand
8) Not considering how expensive some pieces of equipment maybe to purchase for a recipe you may not even like

….I could continue but I think I’ve considered the majority of you.

I know exactly how easy it can be to get carried away on pinterest an pin hundreds of lentil meatless balls recipes to a board to try when your family cannot stand lentils. I’ve been there; and that’s why today I will try to demistify meal planning and make it something you CAN do and be successful at.

Let’s dive straight in.

1) BUDGET BUDGET BUDGET
We need to keep this real y’all. How much do you have to spend a week/month. If you have a monthly budget break it down into 4 to see how much you have per week.
TIP: if you really are unaware of food prices log onto a Superstore website and look up prices on the items you’ll be using e.g. meat, pasta, yogurts. I always start by looking at the essential items.

2) How much time do you REALLY have to prepare and cook meals? Do you have a couple hours on a Sunday to prepare for the week ahead? Do you have a block once a month to make a couple of meals you an freeze? Be realistic. We all have lives. You cannot be super wifey, super mama and work long hours and cook organic vegetable lasagna with homemade pasta sheets every day.

NOTE: If you planned to do a bulk preparation session PUT IT IN YOUR DIARY NOW.

So be realistic; go through your diary/plans and look at what time you have on your hands. If your main aim is to eat healthier and you are struggling with time you need to consider freeing up time in your life; after all health is something we cannot put a price tag on.

3) What do you actually enjoy eating? What are your favourite meals? Where do you enjoy eating out?

Make a list of your favourite meals (even the naughtier ones that would give your Doctor a shock).

4) What equipment do you have (or can borrow)?
Do you have a Slow cooker? Maybe a pressure cooker? A panini maker collecting dust?

5) How much fridge and freezer space do you have? Can you brown meat/mince etc for a few days in advance or will you struggle to fit yogurt and milk in?

6) Look up recipes you’ll be using based on the food you enjoy. You may have recipe books. You could also pop into your local Library to borrow some books. Or use the internet.

7) Find a meal planner that works for you. I created my own which has enough space for me to jot down if we’ve got a busy day that day so I don’t over commit to cooking that day.
I keep my Family Calendar on the table as I plan my meals; this helps majorly because I can also see if I need to prepare lunches etc too (which I often use leftovers for).

Note: NOT all the meals I cook are from recipe books. Some are meals I’ve grown up on or use weekly.
You don’t need to try new recipes every single night! That’s going to stress you even more.
If you are an expermental cook set aside maybe two nights a month to try something new. I would ensure you either have leftovers from the night before or a simple meal alternative incase the meal doesn’t go to plan (so maybe the night after a Roast meal. That way you can use leftover roast chicken in tortilla wraps and make cheese and chicken quesadillas and serve them with a dollop of yogurt or sour cream).

Now the fun bit: plan out your meals. I try to make life easier by having rough outlines to what I am aiming to cook on a weekly basis based on what the family eat so I have sub-categories:

Once a week pizza (frozen)
Once a week Pasta dish
Once a week Mince based meal
Once a week Chicken based meal
Once a week Roast chicken meal (with/without all the sides depending on what we fancy)
Once a week fish option
One a week vegetable/lentil based meal

Now some weeks I don’t cook a meal from all those categories but we try our best to vary our diets as it’s important to not get bored with meals and to get as many vitamins, protein etc as recommended.

Some meals cross over more than one category for example:
Chili con carne ‘Shepard’s pie’-it contains mince and a hearty dose of vegetables in the carrot and root vegetable topping. It also contains red kidney beans (lentils=extra protein).

Desi style keema pasta bake: contains pasta and mince chicken. So it’s a pasta dish, contains chicken which is mince.

Notes:
I don’t usually plan lunches UNLESS it’s the holidays as we’re usually busy and I get bored of sandwiches everyday.
I also increase food budgets in holidays because you have extra people around at lunch time.
I also reassess time restraints in holiday lunch planning.

8) Do you shopping after checking what you have in that you will be using.

9) PRINT out your meal plan and keep one on the fridge, one on the family notice board (if you use one) and once in your planner. Whilst you are getting used to meal planning you can do with having gentle reminders.

10) And for the big event itself: get cooking based on your Meal Plan.

What happens next?

Firstly, don’t panic if things don’t go to plan at first. You may have glitches and that’s fine!

Have back up meal ideas if you are trying something you are not sure will go down well with the family (I offer my children toast, beans on toast, spaghetti on toast etc as alternatives to anything they get to fussy with).

NOTE down which meals worked best and which DIDN’T. It’s absolutely fine to cook the same meal a few times a month. It’s also fine to rule out certain dishes too.

Extra useful TIP: I made a list of 7 meals by children and I enjoy and I always include them on the plan. ALWAYS. I also have a Pizza meal night which is Friday’s. I use frozen pizza and that takes away another 3/4 meals a month. That helps me a lot and my girls get their treat too (whilst watching a movie).

Give yourself a pat on the back because getting used to meal planning at first can be very stressful!

I hope that’s helped you somehow: I wish someone had explained to me the basics of meal planning when I first started planning meals and also pointed out that I didn’t have to try something new everyday; and I don’t have to cook anything we don’t enjoy (if your choice is based on nutritious value look for an alterative because in all honesty meal time struggles are not worth the energy lost).